
The Ultimate Hobnob Biscuit Recipe: Mastering the Classic Oat Crunch
Replicating the signature crunch of a shop-bought Hobnob requires more than just mixing oats and sugar; it depends on the precise emulsification of golden syrup and butter to coat every grain. This recipe focuses on achieving that rugged, “nubbly” texture through a specific ratio of rolled oats to self-raising flour. By mastering the thermal transition from a sticky dough to a toasted, caramelized disc, you can produce a biscuit that maintains its structural integrity even when dunked.
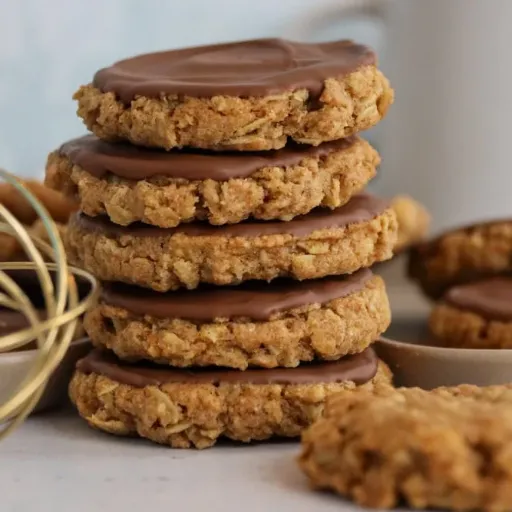
The Anatomy of a Perfect Oat Biscuit
A shop-style oat biscuit is a structural marvel held together by a specific fat-to-fiber ratio. Unlike a standard digestive, which relies on a fine wholemeal crumb, the hobnob biscuit recipe depends on a “short” dough that fries the oats in butter and sugar as it bakes. This process creates the iconic craggy surface and deep, toasted flavor. Industry observation suggests that the internal matrix must remain porous enough to allow for a clean “snap,” yet dense enough to survive a five-second dunk in hot tea. Achieving this balance is less about luck and more about the physical behavior of your grains under heat.
Rolled Oats vs. Jumbo Oats: Finding the Right Texture
The secret to that signature mouthfeel lies in a specific mechanical split. If you use 100% jumbo oats, the biscuit often lacks the “dust” needed to fill the gaps between larger flakes, leading to a bake that shatters too easily. Conversely, using only fine rolled oats can result in a texture that feels more like a heavy granola bar than a light biscuit.
A practical example used by professional bakers involves a 65/35 split. By taking about 35% of your jumbo oats and pulsing them in a processor for just 4 seconds, you create a varied grit. This “oat flour” acts as a secondary binder, while the remaining whole flakes provide the fibrous “knobbly” bite that defines the classic recipe.
Why Golden Syrup is the Non-Negotiable Binder
Golden syrup is an inverted sugar, meaning it behaves differently than standard granulated sugar when exposed to high temperatures. It serves as a powerful humectant, pulling just enough moisture from the air to keep the biscuit from becoming a dry cracker.
In a realistic scenario where a baker substitutes honey, the result is often too soft because honey contains about 18.2% water—roughly triple the moisture content of professional-grade syrup. This extra hydration tends to over-activate the leavening agents. The result? A biscuit that spreads excessively and lacks the characteristic amber caramelization that only golden syrup provides during the final three minutes of baking.
Professional Hobnob Biscuit Recipe: Step-by-Step
Precision in a hobnob biscuit recipe starts with weight, not volume. Professional results depend on the “rubbing-in” method, which coats the flour particles in fat to inhibit excessive gluten development. This ensures the biscuit remains “short” and snappy rather than bread-like.
Phase 1: The Dry Integration
Whisk together 155g of self-raising flour, 265g of your prepared oat blend, and 1.5g of fine sea salt. In a separate bowl, take 172g of cold, cubed unsalted butter. Rub the butter into the dry ingredients using your fingertips until the mixture resembles coarse, sandy gravel. You aren’t looking for a smooth paste yet; the goal is to leave tiny “islands” of fat that will create steam pockets during the bake.
Phase 2: The Syrupy Liaison
Gently heat 118g of caster sugar and 2.5 tablespoons of golden syrup in a small pan. Do not let it boil. You only want the crystals to dissolve into a clear, amber liquid. Pour this warm syrup directly into the center of your oat crumble.
A realistic scenario often unfolds here: the dough looks impossibly dry and refuses to clump. Resist the urge to add milk. Industry observation suggests that the residual heat from the syrup takes about 45 seconds to soften the butter enough for the mass to bind. Use a stiff spatula to press the mixture against the side of the bowl until a tacky, heavy ball forms.
Phase 3: Shaping and Thermal Setting
Divide the dough into 32g portions—roughly the size of a large walnut. Roll them into smooth spheres and place them on a heavy-gauge baking tray lined with silicone or parchment.
Practical example: space these at least 5cm apart. Because of the high sugar and syrup content, these biscuits tend to spread aggressively. Bake at 180°C for exactly 14 minutes. The edges should look dark gold, while the center appears slightly underbaked; they will firm up into a perfect crunch as they cool on the tray.
4 Common Pitfalls That Lead to Greasy or Crumbly Biscuits
Even a technically sound hobnob biscuit recipe can fail if the thermodynamic relationship between the fat and the oats is ignored. The most frequent frustration is a biscuit that “leaks” oil on the tray, resulting in a greasy, thin disc rather than a sturdy oat cake. This usually happens when the butter is too warm before it hits the oven. If your kitchen is over 24°C, the butter loses its ability to hold the oat flour in suspension.
Another culprit is the “over-pulse” of your jumbo oats. Industry observation suggests that if the oat particles are reduced to a fine powder—less than 0.5mm in diameter—they lose their structural “wicking” ability. Instead of absorbing the melting sugars, the fine dust simply coats the fat, creating a crumbly mess that shatters the moment you touch it.
A realistic scenario: a baker notices the dough is a bit sticky and adds a splash of water to “smooth it out.” This is a mistake. Water activates the gluten in the self-raising flour too aggressively. Practical example: while you might get a cohesive dough, the final bake will be tough and “bready” rather than snappy.
Finally, watch the bicarbonate of soda. Just 2.4g too much can disrupt the pH balance of the golden syrup, causing the biscuits to puff up and then collapse into a fragile, honeycomb-like structure that lacks the classic dense crunch. Cautious measurement with a digital scale is the only way to avoid this chemical imbalance.
Temperature Control
In a professional hobnob biscuit recipe, thermal management starts long before the oven door opens. The goal is to keep the butter in a plastic, workable state without reaching its melting point of roughly 32°C. If the dough becomes too warm during the rolling stage, the sugar and fat will begin to leach out, ruining the eventual snap.
Industry observation suggests that a 22-minute rest in the refrigerator—ideally at 4°C—is the sweet spot. This allows the oats to fully hydrate and the fats to re-solidify. A realistic scenario: you skip the chill and head straight to the bake. The result? A biscuit that “pancakes,” spreading into a thin, greasy lace rather than a proud, knobbly disc. Practical example: if you find the dough sticking to your palms, your body heat is already compromising the structure. Cooling your hands under a cold tap before shaping can maintain the necessary 18°C dough temperature required for a consistent, professional rise.
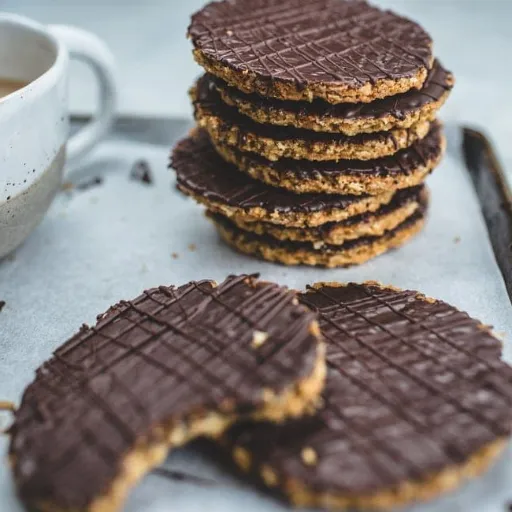
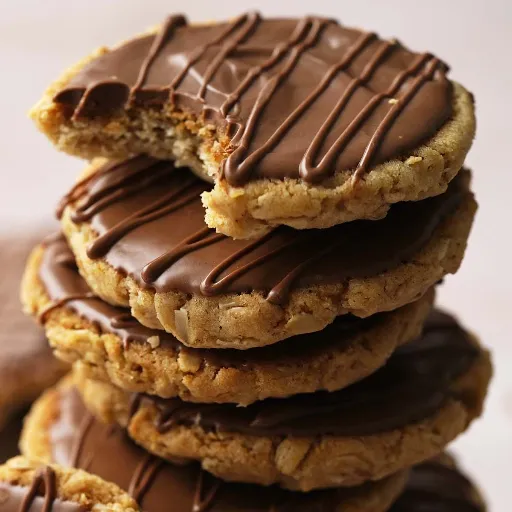
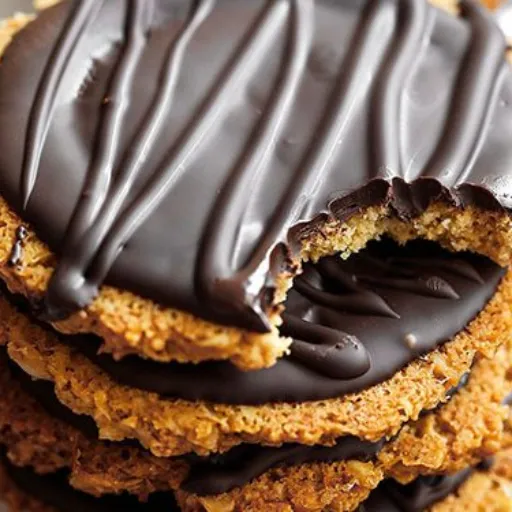
Elevating the Finish: How to Achieve That Iconic Chocolate Wave
The distinction between a standard oat biscuit and a true “luxury” hobnob often comes down to the quality of the coating. We are looking for a thick, opaque layer that doesn’t just melt on contact but provides a structural counterpoint to the saltiness of the oats. Industry observation suggests that using a milk chocolate with at least 34% cocoa solids provides the best flavor balance. If the chocolate is too thin, it seeps into the crannies of the biscuit, losing that satisfyingly smooth surface that defines the commercial classic.
Tempering Chocolate for a Snap and Gloss
To avoid a dull, tacky finish, the chocolate must be tempered. This isn’t just about melting; it’s about controlling the crystal structure of the cocoa butter. A realistic scenario: you melt the chocolate entirely, but it remains soft at room temperature and develops white “bloom” streaks. To prevent this, heat two-thirds of your chocolate to 45°C, then “seed” it by stirring in the remaining third of cold, chopped pieces. Stir continuously until the temperature drops to exactly 31.2°C. This specific thermal window ensures the Beta crystals align, giving you that professional snap and a mirror-like gloss that won’t smudge when handled.
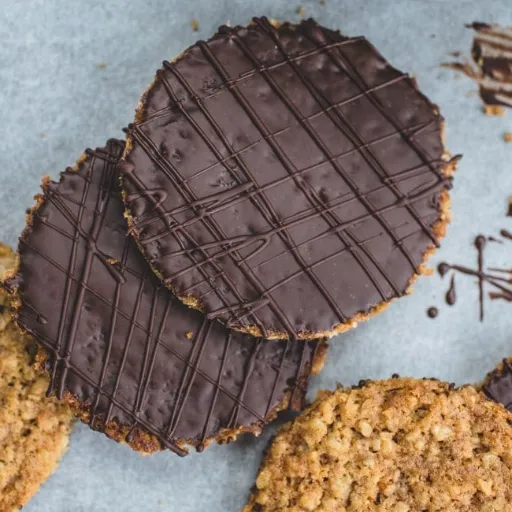
The Fork Technique for Traditional Patterning
The “wave” isn’t just for aesthetics; it increases surface area for flavor. Once you have submerged the base of the cooled biscuit into your tempered chocolate, set it face-up on parchment paper. Wait about 40 seconds for the chocolate to begin its initial set. Take a standard dinner fork and light-handedly drag the tines in a horizontal zig-zag across the surface. Practical example: if the chocolate is too runny, the lines will bleed back together; if it’s too firm, the fork will tear the coating. Timing is everything.
Storage Science: Keeping the Crunch Intact
Water is the enemy of the oat biscuit. Because the hobnob biscuit recipe uses golden syrup—a humectant—the biscuits naturally want to pull moisture from the air, which leads to “softening.” Cautious storage is mandatory. Place the finished bakes in a tin with a tight-fitting silicone seal.
A pro tip used in high-volume bakeries involves adding a small parchment sachet of food-grade silica or even a few sugar cubes to the container. These act as sacrificial moisture absorbers. At a stable 19°C, a well-sealed hobnob can maintain its peak crunch for up to 12 days, though the aromatic oils in the oats tend to be most vibrant within the first 72 hours of baking.
Small Batch vs. Commercial Scaling: What Changes?
Scaling a hobnob biscuit recipe from a kitchen bowl to an industrial floor isn’t a simple matter of multiplication. When you move from 12 biscuits to 1,200, the physics of heat retention and moisture migration shift dramatically. Industry observation suggests that large-scale mixers generate significant internal friction, which may raise the dough temperature by as much as 4.2°C during a standard five-minute cycle. This heat begins to melt the butter prematurely, often leading to “oil-out” before the biscuits even reach the oven.
In a realistic scenario, a commercial baker cannot rely on “rubbing in” by hand. Instead, they use planetary mixers with paddle attachments, where the sequence of ingredient entry is vital. Practical example: adding the golden syrup too early in a large batch can coat the flour before the fat does, resulting in a rubbery texture rather than a short, snappy one. Cautious adjustments to leavening agents are also necessary; while a teaspoon of bicarbonate works for a home batch, industrial ovens with high-velocity fans often require a 12% reduction in chemical leaveners to prevent the biscuits from becoming overly porous or structurally weak during bulk packaging.
Does Chilling the Dough Actually Improve the Bake?

In the world of the hobnob biscuit recipe, patience is a functional ingredient. Skipping the rest period in the refrigerator often results in a biscuit that spreads into a thin, greasy lace rather than a proud, knobbly disc. Industry observation suggests that a 22-minute chill—ideally at a consistent 4°C—is the “sweet spot” for structural setting. This pause allows the oats to fully hydrate, absorbing the ambient moisture from the golden syrup and butter. When the oats are properly saturated, they become less likely to “shed” the fat during the initial blast of oven heat.
A realistic scenario: you’re in a rush and head straight from mixing to baking. Because the butter is likely hovering around 21.6°C from the heat of your hands, it melts instantly in the oven before the flour has a chance to set. This leads to a “pancaked” biscuit with oily edges. A practical example of the benefits of chilling is the depth of flavor; a cold rest allows for subtle enzymatic breakdowns in the grains, intensifying that toasted, nutty aroma that defines a high-quality oat biscuit. Cautious cooling also ensures the bicarbonate of soda reacts evenly, preventing lopsided rising or a metallic aftertaste.
FAQ Section
Q: Can I substitute honey for golden syrup in a hobnob recipe?
A: While physically possible, honey contains significantly more water than golden syrup, which often results in a softer, cake-like texture rather than the traditional crunch. Golden syrup acts as a heavy inverted sugar that caramelizes at a specific rate, providing the distinct amber color and “snap.” If you must swap, expect a more pronounced floral flavor and a biscuit that may require a slightly longer bake at a lower temperature to dry out properly.
Q: Why did my biscuits spread too much in the oven?
A: Excessive spreading is usually caused by the butter being too soft before the tray enters the oven. If the fat melts before the flour and oats have formed a structural “set,” the dough loses its height. To prevent this, ensure your dough is chilled to roughly 4°C. Additionally, check that you haven’t over-measured the golden syrup or sugar, as high concentrations of these humectants encourage the mixture to liquefy and flatten during the first few minutes of heating.
Q: How do I make these biscuits gluten-free without losing the texture?
A: Achieving the classic bite requires using certified gluten-free oats and a high-quality stabilized flour blend. Since gluten provides the “stretch” that holds the oats together, you may need to add a 1/4 teaspoon of xanthan gum if your flour blend doesn’t already include it. Industry observation suggests that gluten-free versions benefit from a longer resting period—about 30 minutes—to allow the alternative starches to fully hydrate, which prevents the final biscuit from feeling unpleasantly gritty.
Q: What is the secret to getting the edges perfectly golden and crisp?
A: The key lies in the “dual-stage” caramelization of the sugars. Using a heavy-gauge dark baking tray can help conduct heat more efficiently to the base and edges. For that professional finish, look for the “halo” effect: the edges should be a deep mahogany while the center remains a pale gold. Leaving the biscuits to cool completely on the hot tray for 5 to 8 minutes allows the residual heat to finalize the evaporation of moisture, resulting in a superior, long-lasting crunch.
Q: Can the unbaked dough be frozen for later use?
A: Yes, this dough freezes exceptionally well due to its high fat and sugar content. For best results, roll the dough into individual 32g balls and “flash freeze” them on a tray before transferring them to an airtight bag. When you’re ready to bake, you can place the frozen spheres directly onto a baking sheet. Just add 2–3 minutes to the standard baking time to account for the core temperature, ensuring the center reaches the necessary thermal set without burning the exterior.
Q: How long do homemade hobnobs stay fresh in a tin?
A: In a standard airtight container, these biscuits maintain their peak texture for about 7 to 10 days. Because they contain oats and golden syrup, they are prone to absorbing atmospheric moisture, which eventually turns them soft. If you notice them losing their snap, you can briefly “refresh” them in a 150°C oven for 3 minutes to drive off excess humidity. For longer storage, they can be frozen after baking for up to three months without significant loss of flavor.