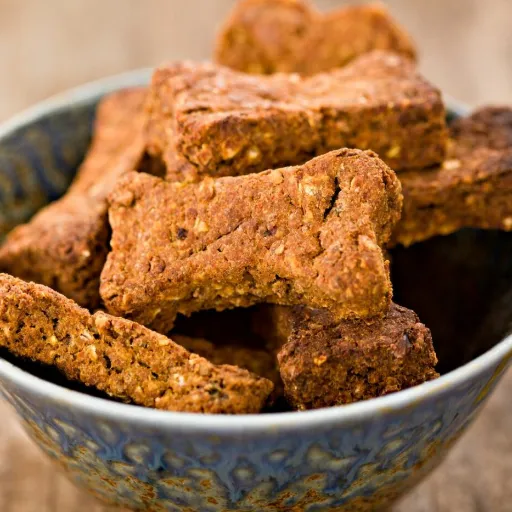
The Science of the Snap: Mastering the Hard Dog Biscuit Recipe
A successful hard dog biscuit recipe hinges on complete moisture extraction to achieve a professional-grade snap and extended shelf life. Beyond basic mixing, the process requires specific flour-to-fat ratios and a controlled dehydration phase to ensure the treats are mechanically tough enough for dental scraping. This guide focuses on the technical variables—such as oven dwell time and binding agents—that transform a standard dough into a durable, tooth-cleaning biscuit.
Why Hardness Matters
A superior hard dog biscuit recipe isn’t just about making a treat that lasts longer; it’s about the physics of the bite. When a dog’s teeth penetrate a truly hard surface, the material must resist shattering immediately. This resistance creates a specific “drag” against the tooth enamel. If a biscuit is too soft, it crumbles into a paste that actually sticks to the gums, potentially feeding the very bacteria you want to eliminate. Industry observation suggests that the sound of a “clean snap” is the primary indicator that the starch matrix has fully dehydrated, turning a simple snack into a functional tool for canine health.
Dental Benefits and Plaque Mechanical Removal
The primary advantage of a rigid biscuit is mechanical debridement. As the dog chews, the hard edges of the biscuit act as a gentle abrasive. This friction helps scrape away soft plaque before it can calcify into tartar. In a realistic scenario, a dog consuming a diet of exclusively soft food may develop significant buildup within months, whereas the inclusion of hard-baked treats can provide a daily “brushing” effect.
A practical example is the use of whole wheat or rye flours; these grains contain robust fibers that reinforce the biscuit’s structure, allowing it to withstand a bite force of up to 200 to 250 Newtons before breaking. This sustained pressure is what facilitates the cleaning action.
Determining the Ideal Moisture Content for Shelf Stability
Moisture is the enemy of the crunch. For a biscuit to stay hard and safe for months, the final water activity level needs to be remarkably low—typically under 11.4%. Most home bakers pull their treats out of the oven too early, leaving a soft, “chewy” center that feels fine today but breeds mold tomorrow.
Cautious phrasing is necessary here: while a biscuit might feel bone-dry to the touch, residual internal steam often migrates outward during cooling. To achieve true shelf stability, the cooling process must be as controlled as the baking. Reducing the moisture to these concrete numbers ensures that the sugars and starches undergo a full “glass transition,” locking the biscuit into a permanent, rock-hard state that resists spoilage without the need for synthetic preservatives.
Essential Binding Agents
In a hard dog biscuit recipe, the binder is the glue that prevents the “snap” from turning into a “shatter.” While flour provides the bulk, you need a secondary agent to cross-link the starches. Eggs are the standard choice, providing a protein-based lattice that hardens as it denatures. Industry observation suggests that using just the egg white can actually produce a stiffer, glassier finish, whereas the yolk adds fats that—while nutritious—may subtly soften the final crumb.
A realistic scenario: you’re out of eggs and reach for applesauce. This swap introduces pectin, a natural carbohydrate binder. While pectin is effective, it is also a humectant. A practical example of this shift is the extended bake time required; you might need to increase your drying phase by 18 to 22 minutes to compensate for the applesauce’s water content. Cautious use of binders like flaxseed meal or even a touch of gelatin can also work, provided you maintain the correct hydration ratio to ensure the dough remains workable rather than a sticky paste.
The Professional Hard Dog Biscuit Recipe
Consistency in a hard dog biscuit recipe is a product of hydration control. Unlike human pastries that thrive on aeration, a functional dog treat requires a dense, de-aired dough. To achieve this, mix 320g of your chosen flour with one large egg and approximately 115ml of water or low-sodium broth. The goal is a stiff, almost recalcitrant dough that resists the rolling pin.
Flour Selection: Whole Wheat vs. Oat vs. Rice
Your base grain dictates the final structural integrity. Whole wheat is the industry standard for hardness because its high gluten content creates a resilient protein web. However, a practical example for sensitive dogs is oat flour; while it lacks gluten, its high beta-glucan content creates a “gummy” bond that hardens significantly upon drying.
Rice flour tends to be the outlier. It produces a very hard, glass-like snap but lacks the fibrous “grip” of wheat. In a realistic scenario where you need maximum dental scraping, a 70/30 blend of whole wheat and rye flour often yields the most abrasive, tooth-cleaning surface.
Proper Fat Ratios to Avoid Softening
Fat is a “shortening” agent—it literally shorts the gluten strands, making things tender. This is the opposite of our goal. Industry observation suggests keeping fat content (from oils or peanut butter) below 8% of the total weight. If you exceed roughly 22g of fat per batch, the biscuit may feel hard on the outside but will retain a “cakey” core. Cautious addition of fats ensures the biscuit remains a dental tool rather than a high-calorie soft snack.
The Double-Bake Method for Maximum Rigidity
The secret to professional-grade hardness isn’t a higher temperature, but a longer “dwell time.” Start with an initial bake at 175°C for 28 minutes to set the shape. Then, flip the biscuits and drop the oven to 110°C for another 45 to 60 minutes.
This secondary phase acts as a kiln-drying process. It pulls the deep-seated moisture from the center of the biscuit without burning the edges. By the time they reach room temperature, the biscuits should sound like a ceramic tile when tapped against a counter. This level of rigidity is what ensures the mechanical removal of plaque during mastication.
3 Critical Dehydration Mistakes
Achieving the perfect “snap” in a hard dog biscuit recipe is more about the exit of water than the entry of heat. Many home bakers treat dehydration as an afterthought, but in professional circles, it is the most volatile stage of production.
The first mistake is trapping steam during the cooling phase. In a realistic scenario, a baker pulls a tray of rock-hard biscuits from the oven and leaves them to cool on a solid countertop. This is a recipe for failure. As the internal temperature drops, residual moisture migrates to the bottom of the biscuit; without airflow, it condenses, turning a crisp base into a soggy, mold-prone sponge within 48 hours. Always use a wire rack.
Another frequent error involves inconsistent biscuit thickness. If one treat is 6mm thick and the next is 9.2mm, the thinner one will reach a glass-like state while the thicker one retains a chewy core. Industry observation suggests that even a 2.5mm variance can drastically alter shelf stability. This “soft heart” contains enough water activity to trigger spoilage, even if the exterior feels bone-dry.
Finally, relying on high heat for speed backfires. Cranking the oven to 200°C case-hardens the dough. This creates a toasted outer shell that seals moisture inside, effectively steaming the biscuit from the inner out. Cautious dehydration at a lower, steady 110°C is the only way to ensure the center reaches that critical 10% moisture threshold without scorching the edges.
How Does Oven Temperature Affect Final Density?
The density of a biscuit is largely a result of how quickly the internal structure sets compared to the rate of evaporation. If you bake at a high heat—say, 190°C—the proteins in the flour and egg coagulate almost instantly. This traps gasses and moisture inside, creating a “puff” that results in a lighter, airier crumb. While this is great for a human cookie, it is detrimental to a hard dog biscuit recipe. A porous biscuit is structurally weak; it shatters into powder rather than providing the abrasive resistance needed for plaque removal.
Industry observation suggests that the densest biscuits are achieved through a “slow-climb” thermal profile. By starting the oven at a moderate 160°C and slowly tapering down, you allow the moisture to escape before the starch walls become too rigid to move. A practical example: a biscuit baked at a steady, lower temperature of 145°C for 55 minutes will be roughly 14% denser by volume than one blasted at a higher heat for a shorter duration. This concentrated mass is what gives the treat its “stone-hard” quality. Cautious monitoring is required, as even a 15-degree fluctuation can be the difference between a functional dental tool and a brittle snack that lacks the necessary mechanical toughness.
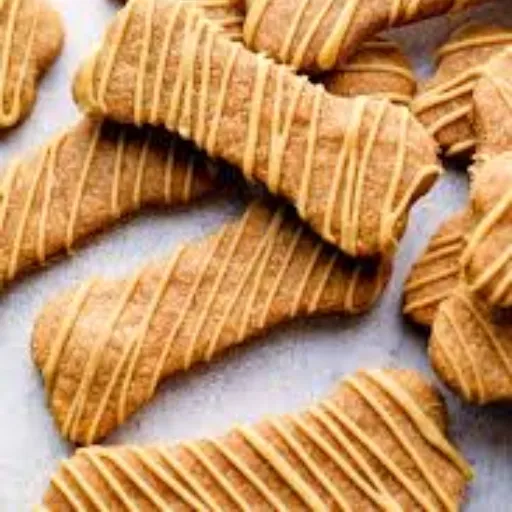
Customizing Flavors Without Compromising Structural Integrity
Flavoring a hard dog biscuit recipe requires a tactical approach to moisture. Adding high-moisture ingredients like fresh meat or fruit chunks is the quickest way to ruin a batch; these pockets of hydration create “soft spots” that harbor bacteria and lead to early spoilage. Instead, think in terms of concentrated solids. You want the aromatic appeal for the dog without the water activity that compromises the snap. Industry observation suggests that the most successful “hard-style” artisans rely on dehydrated powders or highly reduced concentrates to maintain that critical 11.2% moisture ceiling.
Incorporating Lean Proteins and Purees
If you want to add protein, lean is the only way to go. Fats, while palatable, act as plasticizers that can prevent the dough from reaching a glass-like state. A practical example: substituting 45g of your flour for an equal weight of finely powdered liver or dehydrated salmon meal. This provides a massive flavor punch while actually reinforcing the biscuit’s density.
In a realistic scenario where you prefer using fresh purees, like pumpkin or sweet potato, you must treat them as a liquid replacement rather than an add-on. Cautious phrasing is necessary here: these purees contain a high amount of natural sugars which can cause the biscuits to brown—and potentially scorch—before they are fully dry. Reducing the puree in a saucepan until it loses 30% of its volume can help stabilize the final structure.
Safe Herbs and Natural Preservatives
Herbs offer a way to enhance the biscuit without adding any caloric or moisture load. Peppermint and parsley are favorites for breath-freshening, but they also provide a pleasant green fleck in the “stone-hard” matrix. For preservation, many commercial-grade natural recipes lean on Vitamin E (mixed tocopherols) or rosemary extract.
A small inclusion—about 1.8g of dried rosemary per 500g of dough—can act as a mild antioxidant. This helps prevent the small amount of fat in the recipe from going rancid over time. Unlike synthetic preservatives, these natural additions don’t interfere with the crystallization of the starches, ensuring your biscuits stay tooth-shatteringly hard for weeks.
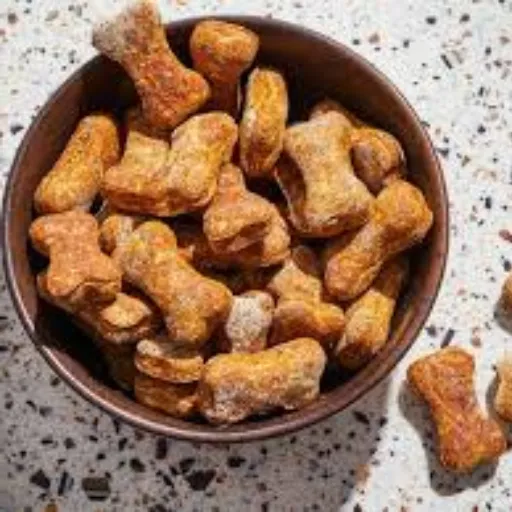
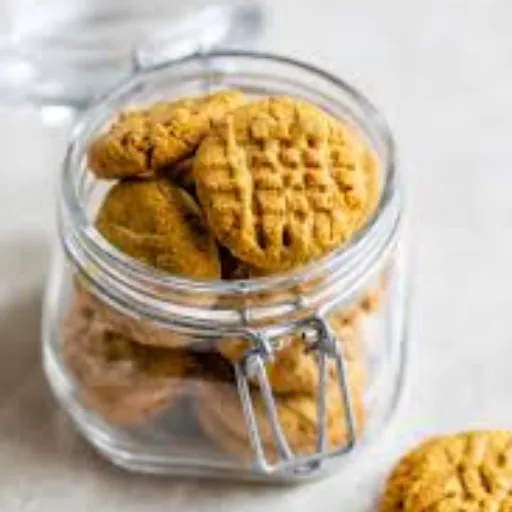
Storage Solutions for Long-Term Crunch
The longevity of a hard dog biscuit recipe depends entirely on the stability of the environment once the cooling phase concludes. If you drop a freshly baked batch into a plastic bag while they are even slightly warm, you create a micro-climate of humidity that triggers rapid softening. Industry observation suggests that glass or tin containers are superior to plastic, as polyethylene can sometimes leach odors into the porous grain structure.
A realistic scenario: you’ve achieved a perfect snap, but after three days in a kitchen cupboard, the treats feel slightly “rubbery.” This is usually due to ambient humidity levels exceeding 55%. To counter this, a practical example involves using food-grade desiccant packets or a small layer of uncooked rice at the bottom of the jar to act as a sacrificial moisture absorber. Cautious monitoring of the seal is vital; even a 2mm gap in a silicone gasket can let in enough moisture to compromise the “glass transition” of the starches, reducing the shelf life from four months to a mere three weeks.
FAQ Section
Q: Why do my dog biscuits turn out soft in the middle?
A: Soft centers are almost always a result of incomplete moisture evaporation. If the oven temperature is too high, the exterior “case-hardens,” trapping steam inside the dough. To fix this, industry observation suggests a lower, slower bake or a secondary drying phase at roughly 110°C. Additionally, ensure your biscuits are uniform in thickness; even a 3mm difference can prevent the core from reaching the critical 11% moisture threshold required for a permanent, rock-hard snap.
Q: Can I make these without a dehydrator?
A: Absolutely. While a dehydrator is efficient, a standard oven set to its lowest convection setting acts as a high-volume kiln. After the initial bake to set the structure, leave the biscuits in the oven with the door slightly ajar as it cools down. This “residual heat” method pulls out deep-seated moisture. For the best results, place the treats on a wire rack rather than a solid sheet to ensure 360-degree airflow, effectively mimicking the dehydration process.
Q: Is it safe to use peanut butter in a hard biscuit recipe?
A: Peanut butter is safe provided it is free from Xylitol and added sugars, but it can complicate the “hardness” of your recipe. Because it is high in fat, it acts as a shortening agent that breaks up gluten strands, which may result in a more crumbly texture rather than a hard snap. If you use it, limit the amount to roughly 15g per batch. This allows for the aromatic appeal dogs love without compromising the mechanical toughness needed for dental scraping.
Q: How long do these biscuits stay fresh without preservatives?
A: When properly dehydrated to a moisture level below 11.5%, these biscuits can remain shelf-stable in an airtight glass jar for up to four months. The key is total water extraction; without moisture, mold cannot colonize the starches. However, in realistic scenarios with high ambient humidity, this window may shrink. To extend freshness, store the container in a cool, dry pantry and consider adding a food-grade desiccant packet to absorb any latent humidity that enters when the jar is opened.
Q: What are the best natural ingredients to make the dough harder?
A: To maximize rigidity, prioritize high-protein binders and fibrous grains. Egg whites provide a glassier, harder finish than whole eggs because they lack the softening fats found in the yolk. Regarding flour, rye and whole wheat are superior because their dense fiber profiles create a more abrasive, “stone-like” matrix. You might also consider adding a small amount of gelatin or cellulose fiber, which reinforces the internal lattice, making the biscuit more resistant to the dog’s initial bite force.
Q: Can I use this recipe for dogs with sensitive teeth?
A: Cautious phrasing is necessary here: while these biscuits are excellent for plaque removal, they may be too taxing for senior dogs or those with existing dental fractures or gum disease. The mechanical pressure required to break a professional-grade hard biscuit can reach over 200 Newtons. If your dog shows hesitation or bleeding gums, it is safer to soak the biscuit in warm broth first or stick to a softer, “chewy” alternative to avoid further dental trauma or pain.