The Science of Confectionery: A Technical Guide on How to Make Licorice
Mastering how to make licorice requires a precise balance of starch gelatinization and moisture control. Unlike simpler candies, licorice is a structured emulsion of molasses, binders, and flavors that must be cooked to specific temperatures to achieve its characteristic chew. This process involves creating a stable slurry, managing sugar crystallization, and allowing for a critical curing period. Understanding these technical variables ensures a consistent texture that avoids the common pitfalls of graininess or excessive stickiness.
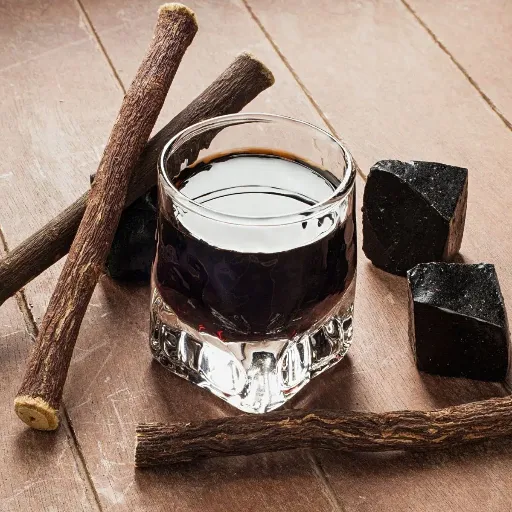
The Foundation of Flavor: Extract vs. Anise
Understanding how to make licorice requires distinguishing between the botanical source and its common culinary surrogate. Authentic black licorice relies on an extract derived from the Glycyrrhiza glabra root. This substance contains glycyrrhizin, a compound roughly 40 to 50 times sweeter than sucrose, which provides the deep, lingering base note characteristic of traditional confections. However, industry observation reveals that many modern “licorice” products actually lean heavily on anise oil. Derived from the star anise pod, this essential oil shares the pungent, aromatic molecule anethole with the licorice root but lacks its thick, earthy mouthfeel.
A realistic scenario: you’re formulating a batch and find the flavor profile feels “thin” or one-dimensional. This often occurs when using anise oil in isolation. While anise provides that immediate, sharp floral hit, it dissipates quickly. A practical example of professional balancing involves using a ratio of 3.2% licorice extract block to 0.15% anise oil. This pairing creates a “flavor bridge” where the anise handles the high-aromatic notes and the extract grounds the candy with a robust, bitter-sweet finish. Cautious dosing is vital here; over-relying on anise oil tends to result in a medicinal or “soapy” aftertaste that masks the complex molasses notes of the slurry.
Essential Raw Materials and Binding Agents
The architectural success of licorice depends on a precisely calibrated slurry. Unlike gelatin-based gummies, licorice is essentially a cooked, sweetened dough. You are building a stable matrix that must remain flexible enough to extrude but firm enough to hold a shape without collapsing. This requires a synergy between starches, sugars, and moisture.
Industry observation suggests that the ratio of solids to liquids is the most volatile variable in the kitchen. If the dry matter exceeds roughly 62% of the total batch weight before cooking, the mixture may seize, turning into a scorched mass rather than a smooth confection. Conversely, too much liquid prevents the “curing” process from ever reaching completion.
The Role of Wheat Flour in Structural Integrity
Wheat flour is the unsung hero of the licorice world. It serves as the primary binding agent, utilizing gluten to create a resilient, rubbery network. When heated, the starch granules in the flour undergo gelatinization, absorbing the surrounding water and molasses to swell into a thick paste.
A practical example of this structural work is the “chew” factor; a high-protein flour (around 12.8% protein) will produce a much tougher, more traditional candy than a soft pastry flour. In a realistic scenario, substituting a low-gluten grain often results in a “short” texture that crumbles when bitten rather than stretching. Cautious heating is required to ensure the flour is fully cooked out, removing any “raw” grain taste without breaking the delicate gluten bonds you’ve worked to establish.
Molasses Quality and Its Impact on Viscosity
Molasses provides more than just the signature obsidian hue; it dictates the flow characteristics of the entire batch. Using a high-quality “blackstrap” or dark treacle introduces a high mineral content and a specific pH level that influences how the starches hydrate.
The viscosity of your molasses often determines the final mouthfeel. A syrup with a Brix rating of 78 to 82 ensures that the sugar solids are concentrated enough to prevent “weeping” in the finished product. If the molasses is too thin, the slurry loses its cohesive tension, leading to a finished strand that feels unpleasantly sticky. Because molasses is a byproduct of sugar refining, its water content can vary between batches. Professional makers frequently adjust their boiling times by 4 to 6 minutes to compensate for these fluctuations in syrup density, ensuring the viscosity remains consistent enough for clean extrusion.
Step-by-Step: The Manufacturing Process
Converting raw binders and syrups into a shelf-stable candy is a game of thermal momentum. You aren’t just mixing; you are engineering a phase change. The transition from a liquid suspension to a semi-solid elastic requires specific energy inputs at precise intervals.
Slurry Preparation and Temperature Control
Everything begins with the slurry. You must achieve a homogenous dispersion of flour into the molasses and water before the heat causes the proteins to clump. A practical example is the “cold-start” method: whisking the dry flour into the room-temperature liquids to ensure every starch granule is hydrated individually. Once smooth, the temperature ramp-up must be deliberate.
Industry observation suggests that a target cook temperature between 104°C and 108°C is the narrow window for success. If you hover at 98°C for too long, the water won’t evaporate sufficiently, leaving you with a sticky mess that refuses to set. Conversely, hitting 112°C might cause the sugars to caramelize too aggressively, resulting in a brittle, burnt-tasting product.
Why Starch Gelatinization is Non-Negotiable
This is the “point of no return” in the manufacturing process. As the mixture hits the 72°C to 85°C range, the starch granules from the wheat flour begin to swell and burst, releasing amylose and amylopectin. This creates the thick, translucent paste that gives licorice its body. Without complete gelatinization, the flour remains suspended as raw particles, giving the candy an unpleasant, sandy mouthfeel.
In a realistic scenario, a batch may look thick but lack the “stretch” of professional licorice. This often stems from a lack of sheer force during the heating phase. You must agitate the mixture constantly to ensure the starch molecules align into long, resilient chains. Cautious heating ensures that these chains don’t “break” or retrogress, which would lead to a “weeping” candy that leaks moisture during storage.
Managing the Cooling Curve for Final Elasticity
Once the cook is complete, the way the temperature drops dictates the final “bite.” If the licorice cools too rapidly—for instance, by being placed immediately in a refrigerator—the sugar crystals may crash out of the solution, causing graininess.
A controlled cooling curve allows the gluten-starch matrix to settle into a uniform, elastic solid. Ideally, the batch should rest at a steady 21°C for at least 18 hours. This slow descent allows the moisture to distribute evenly throughout the strand, ensuring that the first bite is just as resilient as the last. This resting period, or “conditioning,” is what truly transforms a hot paste into an iconic confectionery.
4 Common Texture Defects and Their Causes
Mastering how to make licorice is often a trial by fire—or rather, a trial by starch. When a batch fails, the evidence is usually found in the mouthfeel. Industry observation suggests that most defects stem from a misunderstanding of how sugar and wheat flour interact under thermal stress.
Graininess is perhaps the most frustrating setback. In a realistic scenario, you’ve hit your target temperature, but the final strand feels sandy. This typically occurs because the sucrose has “crashed” out of the solution, creating micro-crystals. If your molasses-to-flour ratio is off, or if you agitated the cooling mass too aggressively, those crystals grow. Cautious use of invert sugars, like glucose or corn syrup, can help “interfere” with this crystallization, keeping the texture smooth.
Shortness, or a lack of elasticity, transforms a chewy treat into something that snaps like a biscuit. This is a protein failure. A practical example is using a flour with a protein content below 10.4%; there simply isn’t enough gluten to build a resilient web. If you also under-cook the slurry, the starch granules never fully burst, leaving the candy structurally weak.
Stickiness and “weeping” are signs of a moisture imbalance. If the final water activity level remains above 14.8%, the licorice will bond to the teeth (and the packaging). This often results from pulling the batch off the heat 5 minutes too early or failing to account for high ambient humidity during the curing stage.
Finally, leathery skin occurs when the exterior dehydrates too rapidly compared to the core. Without a controlled “sweating” period in a humidity-calibrated room, the outside becomes a tough husk while the inside remains a semi-liquid paste, ruining the uniform “bite” that defines professional confectionery.
Why Does Traditional Licorice Require a Curing Period?
Freshly extruded licorice is a deceptively fragile substance. While it looks finished as it exits the nozzle, the internal structure is essentially a hot, supersaturated suspension. Industry observation suggests that skipping the curing phase results in a product that lacks the “memory” required to spring back after a bite. This rest period—often lasting between 24 and 48 hours in a temperature-controlled environment—is where the real magic of starch retrogradation happens.
A realistic scenario: a small-scale producer rushes a batch to packaging after only six hours of cooling. By the time the consumer opens the bag, the pieces have fused into a single, collective mass. Cautious climate control during this window is non-negotiable. If the room is too humid, the candy remains tacky; if it’s too dry, you risk a brittle exterior that cracks under pressure.
Moisture Migration in Finished Confections
The curing room isn’t just for cooling; it’s for balancing the water activity across the entire strand. Immediately after cooking, moisture is unevenly distributed, with higher concentrations typically held within the starch-thickened core. A practical example of successful curing is achieving a drop in moisture content from a post-cook 18.4% down to a shelf-stable 13.2%.
As the licorice “breathes,” water molecules migrate toward the surface and evaporate. This slow exit allows the sugar and flour matrix to tighten uniformly. Without this equilibrium, the center stays spongy while the edges toughen, ruining the consistent resistance that defines a high-quality chew.
Achieving the Signature Matte or Glossy Finish
The visual texture of licorice is determined in the final moments of the manufacturing cycle. A matte finish is the natural state of a flour-heavy slurry that has cured in a low-humidity environment. To achieve that mirror-like industrial gloss, manufacturers often apply a glazing agent—typically a blend of beeswax and vegetable oil—during a tumbling process.
However, the “natural” gloss seen in some premium varieties comes from precise temperature management during the cook. If you maintain a consistent 106°C, the sugars undergo just enough carmelization to create a smooth, light-reflective surface without the need for additives. Cautious handling is required after glazing; even a 0.5% increase in surface oil can prevent the licorice from holding its shape if it is stacked too deep in the cooling bins.
Industrial Scaling vs. Small-Batch Methods
Scaling a licorice recipe isn’t a linear multiplication of ingredients; it’s a recalibration of thermodynamics. In a small-batch, artisanal setting, a maker might use a heavy-bottomed copper kettle to manage a 5kg slurry. Here, the cook has tactile control over the “bloom” of the wheat flour and can react instantly to the darkening hue of the molasses. However, industry observation suggests that once a batch exceeds roughly 45kg, manual agitation fails to provide the shear force necessary for uniform starch gelatinization.
A realistic scenario: an enthusiast attempts to quadruple a home recipe only to find the center remains unpleasantly grainy. This happens because the surface-area-to-volume ratio shifts, trapping heat in the core and scorching the sugars before the moisture can exit. Industrial production solves this through continuous vacuum cooking and high-pressure extrusion.
While a small-batch artisan might hand-rope their candy—a practical example of maintaining a rustic, variable texture—industrial lines rely on precise 28mm die plates to ensure every strand cures at the exact same rate. Cautious scaling requires an understanding that as volume increases, the “dwell time” in the heat must actually be managed more aggressively to prevent the delicate gluten-starch matrix from breaking down into a sticky, non-elastic paste.
Troubleshooting High-Sugar Crystallization
Maintaining a smooth, glass-like internal structure is the primary challenge in how to make licorice. If the sugar molecules find a “seed”—perhaps a stray grain on the side of the kettle or a sudden drop in temperature—they will snap back into a crystalline state, ruining the chew. Industry observation suggests that most failures occur during the final stage of the cook when the water content drops significantly.
The Influence of Inverse Sugars
To prevent a batch from turning into a grainy brick, you must introduce “interfering agents.” A practical example is the strategic use of glucose or honey. These inverse sugars possess a different molecular shape than sucrose, effectively getting in the way and preventing the sugar from interlocking into crystals. Cautious balancing is necessary; adding more than roughly 12% to 15% of your total sugar weight as an invert can make the final candy too soft to hold its shape during extrusion.
Humidity Management During the Extrusion Phase
The environment outside the machine is just as critical as the temperature inside it. If you are extruding in a room where the relative humidity exceeds 62%, the surface of the hot licorice will absorb atmospheric moisture. This creates a “sticky-wet” interface that prevents the formation of a stable skin.
In a realistic scenario, high humidity leads to “slumping,” where the perfectly round strands flatten out under their own weight. Professional setups often utilize dehumidifiers to keep the air at a crisp 40% humidity, ensuring the starch-sugar matrix sets instantly upon contact with the air. This rapid surface stabilization is what preserves the defined ridges and shape of the confectionery.
Calibrating Chew Resistance
Final chewiness is a direct result of how much water remains in the starch lattice. If your licorice feels like rubber, it likely reached a final moisture level of 10.8% or lower. For that classic, yielding bite, you are aiming for a narrow window between 13% and 15% water content. Small adjustments to the cook time—sometimes as little as 90 seconds—can drastically shift the resistance, transforming a brittle rope into a professional-grade candy.
Safety Considerations Regarding Glycyrrhizin
While mastering how to make licorice is a culinary triumph, the primary flavoring agent carries physiological weight that demands respect. Glycyrrhizin, the natural sweetener in licorice root, can trigger a drop in potassium levels and a corresponding rise in blood pressure if consumed in excess. Industry observation suggests that most commercial manufacturers now standardize their extracts to mitigate these risks, but artisanal batches vary wildly.
A realistic scenario: an enthusiast produces a “triple-strength” extract to achieve a deeper flavor, unknowingly concentrating the glycyrrhizin to potent levels. For individuals over 40, consuming as little as 57g of authentic black licorice daily for two weeks may lead to heart rhythm irregularities. Cautious formulation is key. A practical example of responsible production involves blending true licorice extract with anise oil to maintain the desired “black” flavor profile while keeping the actual root extract below a 3.1% concentration. This balance provides the signature earthy notes without crossing into the territory of metabolic concern.
FAQ Section
Q: How long does the curing process typically take?
Patience is the final ingredient when learning how to make licorice. A standard batch requires between 24 and 48 hours to cure properly. During this window, moisture migrates from the core to the surface, allowing the starch-gluten matrix to stabilize. If you attempt to package or consume the candy too early, the texture will feel unpleasantly tacky and the “snap” associated with professional-grade confectionery will be entirely absent.
Q: Can I make licorice without using gluten-based binders?
While wheat flour is the traditional structural anchor, you can substitute it with cornstarch, rice flour, or tapioca starch for a gluten-free version. However, industry observation suggests these alternatives often yield a “shorter” bite that lacks the characteristic chew. To compensate, many producers integrate a small amount of gelatin or agar-agar to replicate the elastic tension that gluten naturally provides, preventing the candy from becoming too brittle or crumbly.
Q: What temperature is considered the “sweet spot” for licorice slurry?
Precision is vital here; you are aiming for a final cook temperature between 104°C and 108°C. This range ensures that enough water has evaporated to achieve a 13.5% moisture content without scorching the delicate molasses. If you pull the mixture off the heat at 100°C, the licorice will likely stay semi-liquid, whereas exceeding 110°C risks a burnt flavor profile and a texture that leans more toward hard toffee than soft chew.
Q: Why did my licorice turn out grainy instead of smooth?
Graininess is a tell-tale sign of sugar crystallization. This realistic scenario often occurs if the sucrose molecules “crash” out of the solution during cooling. To maintain a silky mouthfeel, ensure you are using an interfering agent like glucose syrup or honey, which physically blocks crystals from forming. Additionally, avoid over-stirring the mixture once it begins to cool, as excessive agitation can trigger a chain reaction that turns your smooth slurry into a sandy mass.
Q: Is there a difference between red and black licorice production?
The fundamental manufacturing process remains similar, but the chemistry of the flavorings differs significantly. Black licorice relies on the complex interaction between licorice root extract (glycyrrhizin) and molasses, which contributes to its unique density. Red licorice is essentially a fruit-flavored starch paste that uses corn syrup and artificial dyes. Because red varieties lack the heavy solids found in natural licorice extract, they often require slightly different cooking times to achieve the same structural rigidity.
Q: How do I prevent the mixture from sticking to the molds?
Sticking is usually a symptom of high surface moisture or inadequate lubrication. A practical example used in industrial settings is the application of a thin layer of food-grade mineral oil or a beeswax-based glazing agent to the molds. Furthermore, ensuring your slurry hits the correct cook temperature is crucial; undercooked licorice remains high in water activity, making it naturally more adhesive and difficult to release, regardless of how much oil you use.