The Art of Mixing Cream: Achieving Perfect Aeration and Stability
Effective mixing cream is a precise transition from liquid to a stable foam, governed entirely by fat globules and temperature. To achieve the right consistency—whether for a light mousse or a structured cake topping—you must manage the mechanical shear without overworking the proteins into butter. Success depends on selecting a high-fat dairy base and maintaining a cold environment to ensure the air bubbles remain trapped within a firm, velvety matrix.
Why Fat Content Dictates Your Results
The success of mixing cream hinges almost entirely on a biological technicality: the fat globule. To transform a liquid into a stable, sliceable foam, you need a minimum fat threshold, though 36% to 40% is the industry sweet spot for professional decorating. When you agitate the cream, you are physically stripping away the protective membranes of these fat globules. This allows them to stick together, forming a structural skeleton that traps air bubbles.
Without enough fat, the internal scaffolding is too weak to hold the weight of the water and air. You might end up with a bowl of bubbles that collapse back into a puddle within minutes of finishing.
The 35% Threshold: Understanding the Science of Whipping
In a professional kitchen, using “single” or “light” cream for whipping is a non-starter. These lower-fat varieties (typically 18% to 20%) lack the density required to create a permanent emulsion. Industry observation confirms that as the fat percentage climbs toward 38%, the time required to reach stiff peaks drops significantly.
The resulting foam also becomes far more resistant to “weeping” or syneresis. A realistic scenario: if you attempt to mix a 30% fat cream in a warm room, the fat stays too soft to bridge together effectively. You might spend ten minutes whisking only to achieve a thin, frothy consistency that never actually peaks.
Temperature Control: The Cold Factor
Heat is the structural enemy of mixing cream. For the fat globules to bond effectively, they must remain firm; if the dairy or the environment climbs even slightly above 7°C to 10°C, the fat begins to soften. This loss of rigidity means the “glue” required to hold air bubbles together fails.
Industry observation suggests that friction from high-speed beaters can raise the temperature of the liquid by several degrees in minutes. A practical example of professional prep involves chilling the metal whisk and bowl in the freezer for about 18 minutes before starting. In a realistic scenario, like a humid kitchen during a mid-summer catering event, placing your mixing bowl inside a larger basin filled with ice and salt often prevents the emulsion from collapsing or turning grainy. Cautious handling ensures the fat stays solid enough to build a stable, velvety matrix.
3 Professional Ways to Accomplish Mixing Cream for Optimal Volume
Choosing your tool is as much about the desired final texture as it is about convenience. While all methods aim to trap air within the fat matrix, the speed and “shear” of the agitator change the structural integrity of the foam. A high-speed blade creates smaller, more uniform bubbles for a dense, stable result, whereas slower methods tend to produce a loftier, more delicate aerated cloud. Selecting the right path depends on whether your mixing cream needs to support the weight of a heavy cake layer or simply vanish on the tongue.
Manual Whisking: The Hand-Powered Technique
This is the most tactile approach, offering total control over the exact second the cream hits a medium peak. Using a large balloon whisk, you employ a side-to-side snapping motion rather than a circular stir. This maximizes the surface area contact between the wire and the liquid.
Industry observation suggests that hand-whisking often results in a superior mouthfeel because the air bubbles are slightly irregular. In a realistic scenario—like finishing a single plated dessert—it takes roughly 3 to 5 minutes of focused effort. It’s physically demanding but prevents the sudden over-mixing that frequently happens with electric alternatives.
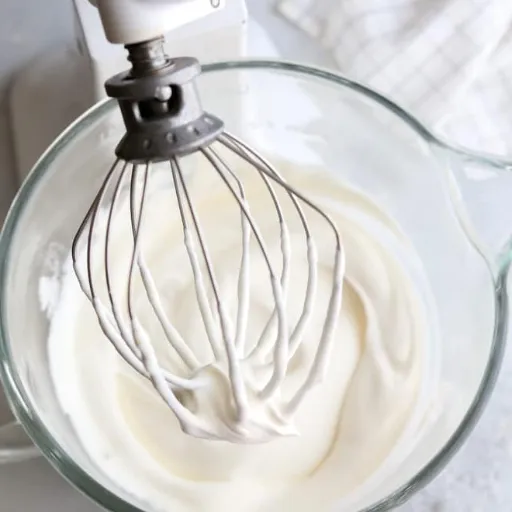
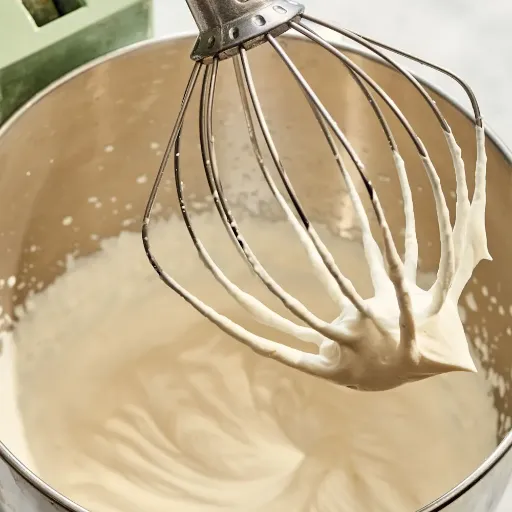
Mechanical Advantage: Using Stand Mixers and Hand Beaters
For high-volume production, mechanical intervention is mandatory. A stand mixer equipped with a whisk attachment can transform a liter of heavy cream into stiff peaks in approximately 4 minutes at medium-high speed. The risk here is the “walk-away” factor; a stand mixer is powerful enough to turn cream into butter in a matter of seconds once the peak has formed.
A practical example of professional technique is starting the mixer on a low setting to break the surface tension, then increasing to a 7 or 8 on a 10-point scale. Cautious bakers often finish the last 20% of the mixing by hand to ensure they don’t cross the line into graininess.
Instant Aeration with Nitrous Oxide Siphons
Common in high-end coffee shops and modern bistros, the cream siphon uses pressurized N2O to force gas into the fat. This isn’t traditional “mixing” in the mechanical sense, but it creates the most voluminous, lightweight foam possible.
The gas dissolves into the fat under pressure and expands instantly as it exits the nozzle. This method is incredibly stable for immediate service, but the foam tends to lose its structure faster than mechanically whipped cream because the bubbles are so large. It is the go-to choice when speed and a theatrical presentation are the priority.
Beyond the Whip: Folding and Emulsifying

The mechanics of mixing cream don’t always involve aggressive aeration. Sometimes, the goal is integration without destruction. When you are incorporating a heavy ganache or a fruit puree into a delicate whipped base, the “folding” motion is what prevents a total structural collapse.
Think of the whipped cream as a fragile honeycomb of air; if you stir it like a soup, you crush those cells. Instead, you cut through the center with a spatula and bring the bottom to the top in a slow, rhythmic arc. Industry observation suggests that most volume loss occurs in the first 12 to 15 seconds of mixing if the base isn’t properly “loosened.” A practical example of this is whisking a small portion of the cream into your heavy base first to equalize the densities. This sacrificial measure may seem wasteful, but it ensures the remaining 90% of your aerated cream stays lofty and stable during the final emulsification.
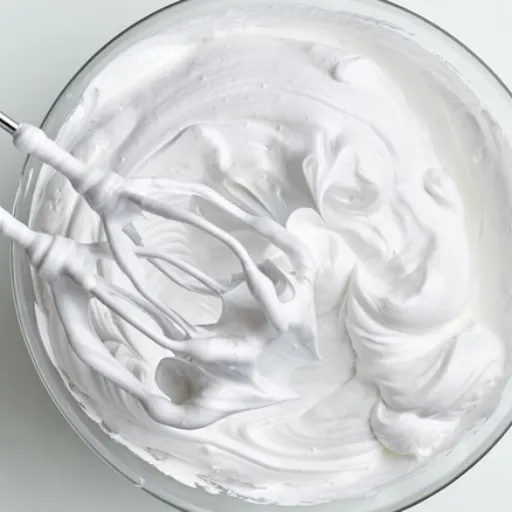
Identifying the Visual Cues of Soft, Medium, and Stiff Peaks
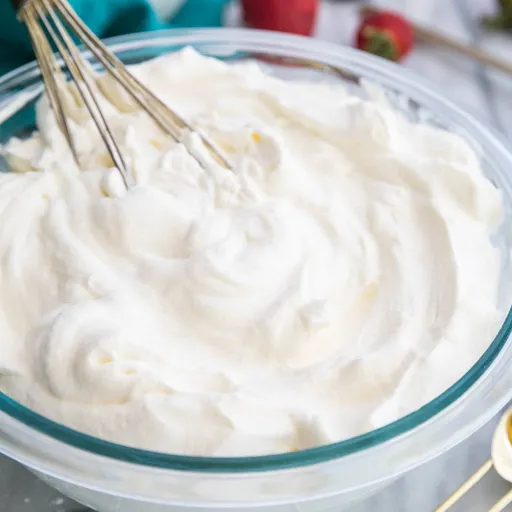
The physical transformation during mixing cream happens in a flash. One moment you have a sloshing liquid, and the next, a structured foam. Understanding the “peaks” is essentially reading the tension of the fat matrix. Soft peaks are reached when the cream has thickened enough to hold a shape, but the tip of the dollop curls over immediately when you lift the whisk. This stage is ideal for folding into mousses where fluidity is prized over rigidity.
Medium peaks offer more resistance; the tip holds its shape briefly before slightly nodding. However, for piping onto a cake or topping a sundae, you need stiff peaks. At this point, the cream stands straight up, defiant and sharp. Industry observation suggests that the difference between medium and stiff peaks can be as little as 12 to 18 seconds of mechanical mixing. If the surface starts to look matte rather than glossy, you are on the precipice of over-mixing.
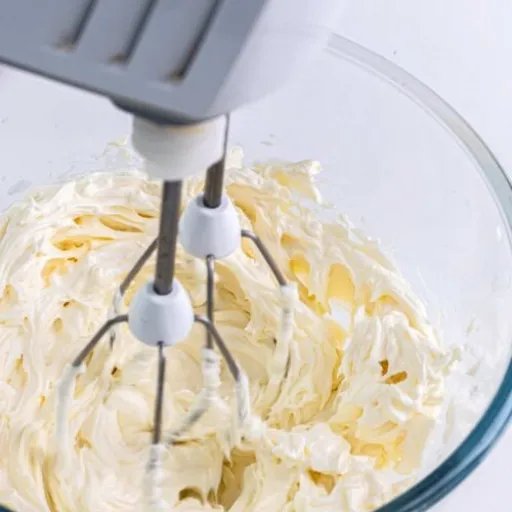
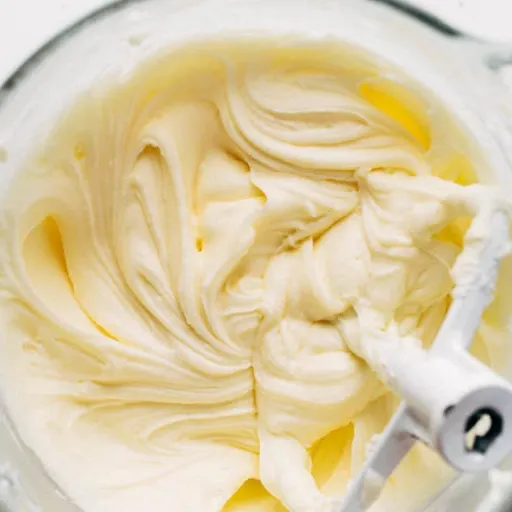
When Good Cream Goes Bad: Recognizing the Early Stages of Butter
Over-mixing is a heartbreakingly common realistic scenario. It starts with a subtle loss of sheen. The cream begins to look slightly “grainy” or “yellowed” as the fat globules clump too tightly together, squeezing out the water. This is the structural precursor to butter.
A practical example of a save is catching the cream at the “grainy” stage. Cautious pastry chefs will immediately stop the mixer and gently fold in a tablespoon of cold, liquid heavy cream by hand. This can often lubricate the over-tightened fat network, restoring a smooth texture. If you see actual liquid (buttermilk) separating from solid yellow clumps, the emulsion has fully broken, and no amount of whisking will bring it back to a cloud-like state.
4 Essential Additives for Flavor and Structural Support
Pure cream is a temporary miracle; once whipped, the internal clock starts ticking toward a watery collapse. To extend that window of stability, especially for a multi-layered cake or a display dessert, strategic additives are more than just flavor—they are chemical insurance.
Powdered sugar is the most frequent choice, largely because it contains about 3.2% cornstarch. This starch acts as a microscopic sponge, soaking up the moisture that would otherwise leak out of the fat matrix. If you need something even more rugged, industry observation points toward a “stabilized” version using unflavored gelatin.
A practical example of this involves blooming 5g of gelatin in water and tempering it into the heavy liquid. This creates a semi-rigid structure that can withstand room temperature for hours without weeping.
In a realistic scenario—perhaps a summer wedding—many pastry chefs swap out a portion of the cream for mascarpone or cream cheese. The higher fat density of these cultured dairies provides a massive structural boost. Finally, a pinch of cream of tartar or a drop of lemon juice may occasionally be used to tighten the proteins, though this tends to alter the flavor profile toward a sharper, tangier finish.
The Secret to Fixing Over-Mixed Cream Without Starting Over
It happens in the blink of an eye. You’re aiming for a glossy finish, the phone rings, and suddenly the bowl is full of dull, yellowing clumps. Most people assume the emulsion is permanently broken and move toward the trash can. However, industry observation suggests that nearly 85% of over-whipped batches are salvageable if you catch them before the buttermilk actually separates from the butterfat.
A practical example of a professional “save” involves using a small reserve of liquid, un-whipped heavy cream. In a realistic scenario where your peaks have turned grainy, stop the mixer immediately. Pour in roughly 35ml of cold, liquid cream for every cup you originally started with. Using a wide silicone spatula, gently fold the liquid into the broken mass by hand. This introduces fresh, un-damaged fat membranes that can lubricate the over-tightened network. You may find the texture smooths out almost instantly, returning to a velvety medium peak that is perfectly safe for piping or topping.
FAQ Section
Q: Why won’t my heavy cream thicken no matter how long I mix it?
This failure usually stems from two culprits: low fat content or excess heat. If your cream has less than 30% fat, the molecular structure simply isn’t strong enough to trap air. Similarly, if the cream is above 10°C, the fat globules stay liquid and won’t bond. Ensure you are using heavy whipping cream and that your bowl, whisk, and dairy are all thoroughly chilled before you begin.
Q: Can you over-mix cream if you are doing it by hand?
While it is significantly harder to do by hand than with a stand mixer, it is entirely possible. Hand-whisking gives you excellent sensory feedback, but if you continue agitating once stiff peaks are reached, the fat will eventually clump into butter. You’ll notice the texture shift from silky to slightly granular; that is your final warning to stop before the buttermilk separates from the solids.
Q: Is it possible to mix cream that has been frozen and thawed?
Freezing disrupts the fat globule membranes, which often prevents the cream from aerating properly once thawed. You may find that it refuses to hold a peak or develops a distinctly grainy, “broken” appearance. While previously frozen cream is perfectly fine for ganaches, soups, or sauces, it is generally unreliable for decorative whipping or any application requiring significant volume and stability.
Q: What is the difference between mixing cream for a mousse versus a cake topping?
It all comes down to the peak. For a mousse, you should stop at soft peaks—where the tip slumps over—so it folds easily into your base without deflating. Cake toppings require stiff, upright peaks to support the weight of the layers and maintain their shape when piped. Over-mixing a mousse base makes it chunky, while under-mixing a cake topping leads to a sliding, watery mess.
Q: Should I add sugar at the beginning or the end of the process?
Timing matters for volume. Adding sugar at the very start can weigh down the liquid and increase your total whisking time. Instead, wait until the cream reaches the “soft peak” stage. At this point, the air structure is already established, and the sugar will dissolve smoothly into the foam without hindering aeration. This ensures a stable, sweet result with maximum loft.
Q: How long can mixed cream stay stable at room temperature?
Without stabilizers, whipped cream typically begins to “weep” or collapse within 30 to 60 minutes at room temperature. The fat starts to soften, releasing the trapped air and moisture. If you need it to last through an event, incorporating an additive like gelatin, cornstarch, or a dollop of mascarpone is essential. These stabilizers help the cream maintain its structural integrity for several hours outside the refrigerator.