
Beyond the Box: Crafting a Nutrient-Dense Teething Biscuit Recipe

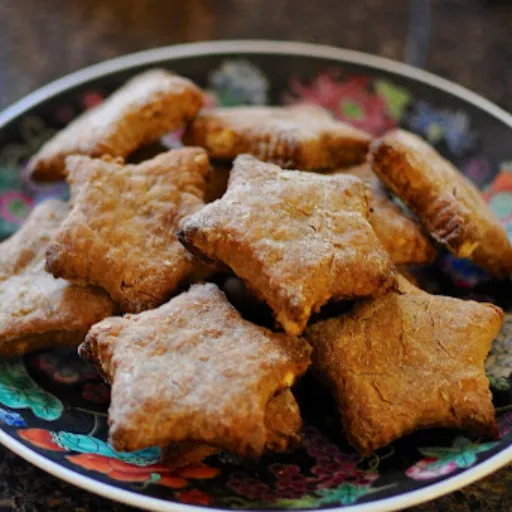
An effective teething biscuit recipe balances structural hardness with a predictable dissolve rate to soothe inflamed gums without crumbling into dangerous chunks. Unlike standard crackers, these biscuits rely on dense binders like oat flour, fruit purees, or sweet potato to create a firm, gnawable texture that withstands heavy pressure. By baking at low temperatures, you achieve a specialized “hard-tack” consistency that provides a safe, edible alternative to silicone teethers for infants transitioning to solids.
The Textural Science of a Safe Teething Biscuit
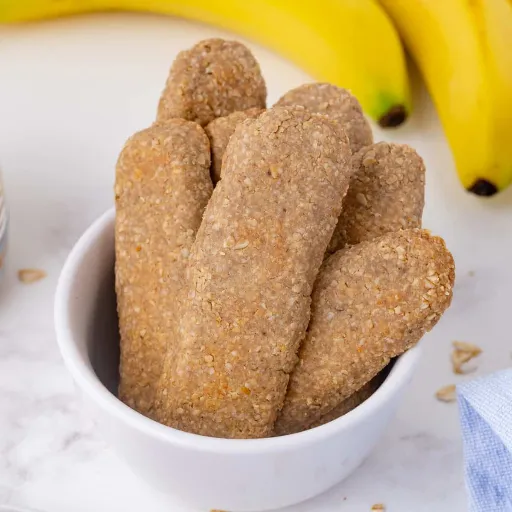
Engineering a teething biscuit is less about baking a snack and more about creating a temporary dental tool. The goal is a specific mechanical resistance. If the biscuit is too soft, the infant simply eats it, missing the therapeutic counter-pressure needed for erupting teeth. Conversely, if it is brittle like a standard cracker, it shatters into sharp geometric shards. Industry observations suggest that the most successful “hard-tack” biscuits utilize a dense crumb structure—often achieved through a 3:1 ratio of dry flour to wet binders—to ensure the piece stays intact under several minutes of constant saliva exposure. A realistic scenario involves a baby gnawing on a single biscuit for 12 to 18 minutes; the recipe must hold its shape throughout this ordeal without losing structural integrity until it is safely turned to mush.
Understanding the “Dissolve Rate” to prevent choking hazards
The safety of a teething biscuit recipe hinges entirely on its “dissolve rate.” This refers to how quickly the baked surface softens when in contact with enzymes in infant saliva. A safe biscuit should not “snap” or break; it should slowly erode. A practical example is using finely ground oat flour or rice flour, which creates a tighter, more cohesive bond than wheat flour. This allows the edges to melt away into a manageable paste rather than breaking off into a 1-centimeter chunk that could pose a swallowing risk. It is this controlled degradation that makes a homemade recipe superior to highly processed, airy commercial puffs that vanish too quickly to provide relief.
Why hardness matters more than flavor for gum relief
While we often want baby food to taste like fruit or vanilla, a teething biscuit’s primary job is to act as a solid object for the jaw to press against. This counter-pressure provides a numbing effect on the sensitive periodontal ligaments. Adding too many fats or oils—common flavor enhancers—tends to tenderize the dough, making it too flaky for effective teething. You are essentially looking for a “hard-as-rock” finish. This hardness ensures the biscuit provides the necessary resistance to massage the gums deeply, which may reduce the systemic irritability and sleep disruption often associated with new tooth eruption.
Core Ingredients and Natural Binders

Baking for a teething infant requires a shift in how we view pantry staples. Instead of looking for fluff and lift, we are searching for density. Industry observation suggests that oat flour—specifically when ground to a fine, sandy consistency—provides the most reliable structural “web” for a biscuit meant to be gnawed. Unlike wheat, which contains gluten that can lead to a rubbery or overly bready finish, oats tend to compress into a solid block.
For the liquid component, skip the oil. A practical example is using a heavy fruit or vegetable puree, such as unsweetened applesauce or roasted sweet potato. These act as natural binders, holding the dry particles together while adding a subtle sweetness that encourages the baby to keep chewing. A realistic scenario? You might find that a ratio of roughly 2.2 cups of flour to 1 cup of puree creates a dough that feels like stiff modeling clay. This low-moisture profile is exactly what ensures the final product won’t crumble under pressure.
3 Essential Variations: Grain-free, Egg-free, and Vitamin-boosted

Customizing a teething biscuit recipe is often a necessity dictated by an infant’s developing digestive system or emerging allergies. You aren’t just swapping flavors; you are recalibrating the chemical bond of the dough. Industry observation suggests that omitting eggs—a common allergen—actually helps in achieving a harder finish, as egg proteins tend to create a “sponge” effect that softens the crumb.
For a vitamin-boosted profile, integrating dark leafy greens or root vegetables can turn a simple gnawing tool into a source of iron and beta-carotene. A realistic scenario involves a parent needing a grain-free alternative for a baby with a sensitive stomach. In this case, cassava flour or coconut flour might be used, though they require significantly more moisture to bind. Using a 22% increase in liquid binders usually compensates for the high absorbency of grain-free starches, ensuring the biscuit doesn’t turn into dry dust in the child’s mouth.
The Sweet Potato and Oat approach for sensitive stomachs
Sweet potatoes are a culinary powerhouse for teething recipes because of their high pectin content. This pectin acts as a natural glue, meshing with the beta-glucans in oat flour to create a remarkably sturdy structure. A practical example is roasting the potato rather than boiling it; this removes excess water, concentrating the starches and natural sugars. This results in a biscuit that is dense enough to massage the gums but gentle on the stomach. Cautious parents often prefer this duo because it avoids the potential inflammatory response sometimes associated with heavy wheat-based teething crackers.
Utilizing Banana as a natural sweetener and structural binder
Bananas serve a dual purpose: they provide the subtle sweetness that keeps a fussy baby engaged and act as a potent humectant. When mashed thoroughly, the long-chain polysaccharides in a ripe banana help hold the dry flour particles together without the need for added fats. To get the best result, use a banana with at least 15% brown spots on the peel. This level of ripeness ensures the fruit is soft enough to incorporate fully into the dough, preventing large, soft pockets that could compromise the biscuit’s required “hard-tack” finish during the baking process.
Step-by-Step: The “Low and Slow” Baking Method

Most kitchen errors in a teething biscuit recipe stem from treating the dough like a standard cookie. If you blast the oven at 350°F, the exterior browns and hardens while the center remains soft and doughy—a recipe for a biscuit that snaps too easily into large, dangerous chunks. Industry observation favors a “dehydration” approach rather than a traditional bake.
Set your oven to roughly 250°F or 275°F. You aren’t looking for the Maillard reaction (browning); you are looking to pull every last milligram of moisture out of the starch. After rolling the dough to a thickness of about 1.3 centimeters, bake the strips for 45 to 60 minutes. A practical example of a successful bake is a biscuit that sounds hollow when tapped with a fingernail.
A realistic scenario to watch for? If the biscuits still feel slightly “givey” when pressed, they need another 15 minutes. Once the timer ends, turn off the heat but leave the tray inside with the door slightly ajar. This gradual cooling phase prevents internal tension and ensures a uniform, rock-hard finish that may last through an entire afternoon of heavy gumming.
Why homemade beats store-bought for active chewers
Commercial teething wafers are often designed for shelf stability and rapid dissolution, which frequently translates to a product that vanishes before it can actually provide gum relief. Industry observation suggests many mass-produced options rely on 85% or more refined rice flour, creating a brittle structure that snaps under moderate jaw pressure. For an active chewer, this is frustrating.
A realistic scenario involves a baby who has already mastered the “pincer grasp” and exerts significant force; a store-bought wafer might last 40 seconds, whereas a dense, homemade biscuit can provide up to 15 minutes of consistent counter-pressure. By controlling the bake, you eliminate the “shatter factor.” A practical example is the ability to omit the high-fructose corn syrup or excess sodium often tucked into “organic” box brands. You get a tool specifically calibrated for the child’s current chewing strength, rather than a generic, airy snack that offers zero resistance to inflamed gums.
Safety First: Knowing when your infant is ready

Introducing a teething biscuit isn’t merely a calendar-based decision; it’s a developmental milestone that requires specific physiological markers. While many resources suggest a blanket “six-month” rule, industry observation among pediatric specialists emphasizes that every infant’s oral-motor progression varies. Giving a hard-tack biscuit to a child who hasn’t mastered the basics of tongue lateralization can transform a soothing tool into a potential hazard.
You are looking for a shift in how they interact with objects. If a baby still pushes everything out with their tongue—the classic “tongue-thrust reflex”—they aren’t quite ready for the eroding texture of a homemade biscuit. A realistic scenario involves the infant sitting upright without slumping; this postural stability is the foundation for safe swallowing. Without that core control, the child cannot effectively manage the small amount of “slurry” or mush that the biscuit creates as it dissolves. Always consult your pediatrician before introducing new textures, especially those designed to be gnawed for extended periods.
Recognizing the vertical chewing motion
Before a child can handle a biscuit, they need to graduate from simple sucking to a rhythmic, vertical “munching” motion. Watch your baby when they have a silicone teether. Do they just hold it, or do they actively move their jaw up and down? This vertical movement—often appearing around the 7-month mark—is the precursor to true chewing. A practical example of readiness is seeing the baby move a toy to the side of their mouth to “gum” it with their molars. This indicates they are learning to move food (or a biscuit) to the back of the mouth where the strongest crushing pressure exists.
4 Signs your baby has the core strength for solids
- Independent Sitting: The baby should sit with minimal to no support. If they lean forward or to the side, their airway isn’t optimally positioned for managing solids.
- Head Control: Stable, steady head movement is non-negotiable. Any “bobbing” indicates the neck muscles aren’t ready to support the complex coordination of swallowing a dissolving starch.
- The “Reach and Grab”: Efficient hand-to-mouth coordination shows the nervous system is ready to regulate the pace of eating.
- Interest in Food: If they watch your fork intently or reach for your plate, their curiosity often mirrors their physical readiness.
Most infants hit these marks between 180 and 210 days of life. However, if your child still seems uncoordinated, it’s safer to wait. The hardness of a teething biscuit requires a “gummer” who can handle the resistance without getting frustrated or overwhelmed by the size of the object in their hands.
Shaping for Tiny Hands

Ergonomics in a teething biscuit recipe is often overlooked, but the shape dictates how long an infant can actually hold the “tool.” Industry observation suggests that a long, rectangular baton—roughly 10 centimeters in length—is superior to rounder shapes. This specific dimension allows the baby to maintain a secure palmar grasp while keeping enough of the biscuit exposed for gnawing.
A realistic scenario involves a frustrated infant dropping a slippery, saliva-coated biscuit because it’s too wide. To prevent this, try “scoring” the dough with shallow ridges before baking. A practical example is using the tines of a fork to create a textured surface; this added friction helps uncoordinated hands keep a firm grip. Avoid small, circular “cookie” shapes, as these tends to be pushed entirely into the mouth, increasing the risk of the child gagging on the object before it has even begun to dissolve.
Storage and Shelf-Life in Humid Climates
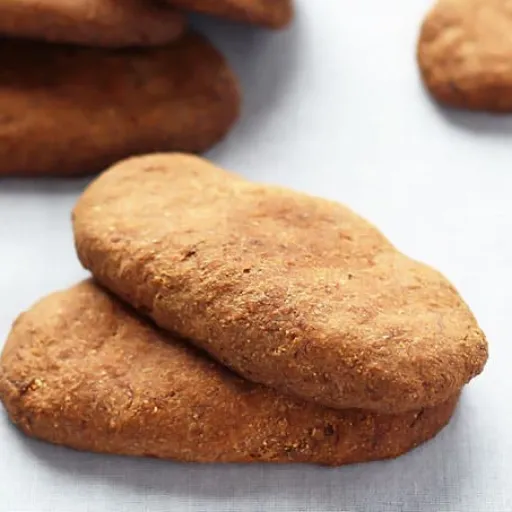
Humidity is the primary antagonist of the homemade teething biscuit. Because these recipes lack the chemical preservatives and high-sodium content of commercial alternatives, they are prone to reabsorbing moisture from the air. In a realistic scenario, a biscuit that was rock-hard on Monday may become unsafely soft or “rubbery” by Wednesday if left in a simple pantry. Industry observation suggests that even a 12% rise in local humidity can compromise the structural snap needed for gum relief. To combat this, treat these biscuits like high-value dry goods. Cautious parents often use glass jars with a tight silicone seal, as plastic containers tends to be slightly more permeable to vapor.
Dehydrating vs. Freezing for long-term use
Choosing between the counter and the freezer depends on your local dew point. For short-term use, a secondary “dehydration” session in a low oven (around 175°F) for 22 minutes can pull out lingering moisture, extending shelf life to about ten days. However, for batches meant to last a month, freezing is the superior choice. A practical example is double-bagging the biscuits to prevent freezer burn. When you are ready to use one, don’t just thaw it at room temperature, as condensation will form on the surface and ruin the “hard-tack” finish. Instead, pop the frozen biscuit directly into a toaster oven for a few minutes to crisp it back to its original, rigid state before giving it to the baby.
FAQ Section
Q: At what exact month should I introduce a teething biscuit?
A: Most pediatricians suggest waiting until at least six months, but biological readiness is more important than a calendar date. Your infant should be able to sit upright without support and have lost the tongue-thrust reflex that pushes solids out of the mouth. If they can successfully move toys to their back gums to chew, they likely have the oral-motor skills required to manage a dissolving biscuit safely.
Q: Can I substitute honey for maple syrup in infant recipes?
A: You should never use honey in any recipe for a child under 12 months old. Honey can contain Clostridium botulinum spores, which lead to infant botulism, a serious gastrointestinal condition. While maple syrup is technically safe in small amounts, most homemade teething recipes thrive without any added liquid sweeteners; the natural starches in oat flour or fruit purees provide enough structural binding and flavor for a developing palate.
Q: Why did my biscuits turn out crumbly instead of hard?
A: Crumbly textures usually result from an excess of fat or a baking temperature that was too high. If you added too much oil or butter, the “shortening” effect prevents the flour from forming a dense, interlocking matrix. Additionally, if the oven was too hot, the outside scorched before the moisture in the center could evaporate. For a rock-hard snap, ensure your ratio favors dry flour and use a “low and slow” dehydration setting.
Q: How do I prevent the biscuit from breaking into large chunks?
A: The secret lies in the choice of flour and the thickness of the baton. Using finely ground oat or rice flour creates a tighter crumb than all-purpose wheat flour, which tends to flake. Aim for a thickness of about 1.3 centimeters; any thinner and the biscuit becomes a brittle cracker that snaps under jaw pressure. A well-baked biscuit should erode into a slurry rather than fracturing into geometric pieces.
Q: Are these biscuits safe for babies with no visible teeth yet?
A: Yes, teething biscuits are specifically designed for the “gumming” stage. The counter-pressure provided by a hard biscuit actually helps soothe the inflammation that occurs before a tooth breaks through the surface. As long as the baby shows the vertical “munching” jaw motion and can hold the biscuit securely, they can use their powerful gums to soften and dissolve the starch for relief.
Q: What is the best way to clean up the “mush” left behind on clothes?
A: Because these biscuits are starch-based, the residue becomes like concrete once it dries. The most efficient method is to scrape off the excess immediately with a blunt spoon. For dried stains, soak the garment in cold water for 20 minutes to rehydrate the starch before tossing it in the wash. Avoid using hot water initially, as heat can “set” the fruit sugars and proteins into the fabric fibers.
Q: Can I add anti-inflammatory spices like ginger or turmeric?
A: Introducing mild spices is a great way to expand a baby’s palate while offering natural relief. A pinch of ginger or turmeric can be incorporated into the dough to help soothe sensitive gums. However, start with very small amounts—roughly an eighth of a teaspoon per batch—to ensure the flavor isn’t too overwhelming. Always monitor for any digestive changes or skin sensitivities when introducing a new botanical element to their diet.