
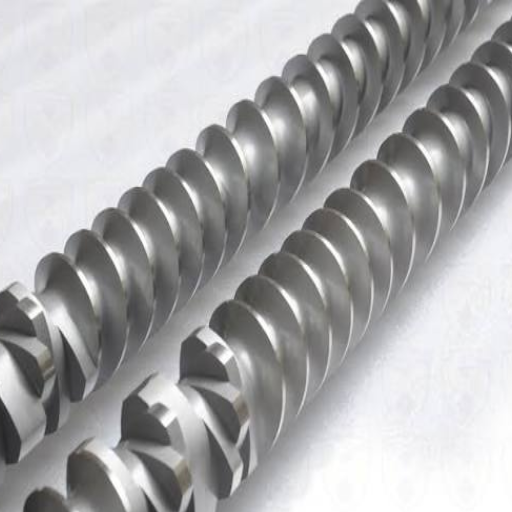
Twin Screw Extruder Screw Configuration: Screw Elements, L/D Ratio & Food Recipes

Twin screw extruder screw configuration is the way you arrange modular screw elements along two intermeshing shafts to control shear, mixing, and pressure. Nail the layout and one machine can produce a light puff snack in the morning and a dense, fibrous plant-based meat in the afternoon. Get it wrong and you burn energy, scorch your starch, and ship product nobody wants to eat.
Most operators treat the screw as a fixed part, like the barrel it turns inside. That’s the mistake. The screw is the single biggest lever you have over texture, expansion, bulk density, and energy cost, and it can be changed without replacing the machine.
Here’s what this guide covers: the four main screw element types and what each one does, how the length to diameter (L/D) ratio shapes the process, how configuration drives specific mechanical energy (SME), and concrete screw recipes for puff snacks, pet food, plant-based meat, and modified starch. By the end you’ll be able to talk to a supplier about screw profiles with confidence, instead of hoping the default works.
Key Takeaways
- The screw is the recipe: changing elements changes shear, residence time, and final product texture more than any process setting.
- Four element types do the work: conveying flights move material, kneading blocks shear and mix it, distributive elements blend additives gently, and reverse elements build pressure.
- A higher L/D ratio (roughly 20:1 to 32:1 for food) buys more barrel zones, more residence time, and more cooking, at the cost of more energy.
- Specific mechanical energy (SME) is the number that summarizes screw work, and reverse or flow-restricting elements raise it while forward conveying lowers it.
- Direct-expanded products like puffs need low to moderate shear with kneading blocks kept away from the die, while high-moisture TVP needs a reverse element to build melt pressure.
What Is Twin Screw Extruder Screw Configuration?
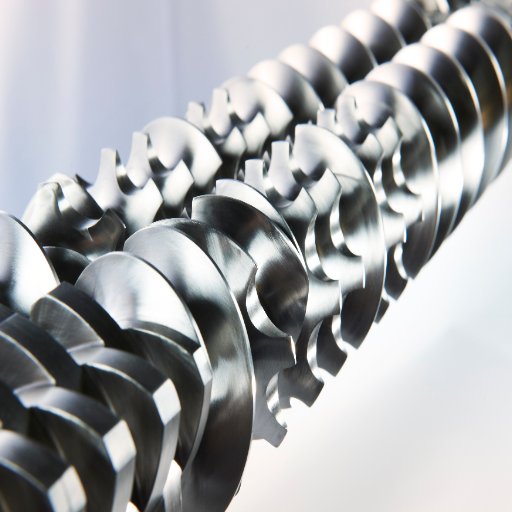
Twin screw extruder screw configuration is the arrangement of modular screw elements, conveying elements, kneading blocks, mixing elements, and reverse elements, along two intermeshing, co-rotating shafts. Together with the barrel’s length to diameter ratio, this layout controls how much shear, mixing, pressure, and residence time the material receives, and therefore the texture, expansion, and quality of the finished product.
The key word is modular. The screws are not machined as one solid piece. Individual elements slide onto two keyed shafts and lock into place, so you can rearrange, add, or remove them to change the process without buying a new machine. This is the foundation of a good twin screw extruder machine: the same barrel and drive can run dozens of products simply by swapping the screw layout.
Why does this matter so much? Because the screw is where nearly all the work happens. It decides how hard the dough is sheared, how thoroughly ingredients are mixed, how long the material stays in the barrel, and how much pressure builds before the die.
Why the Screw Is the Recipe
Think of the screw as the recipe and the process settings as the seasoning. A barrel set to 140 degrees Celsius with a screw full of forward conveying flights will do something completely different from the same barrel with a screw that packs kneading blocks and a reverse element near the end. One produces a low-density, expanded snack. The other produces a dense, chewy texturized protein.
Here’s a concrete example. Marco runs a corn snack line in Guadalajara. His product was coming out dense and hard, and he had spent weeks raising die temperature and tweaking moisture with little result.
A supplier’s engineer looked at his screw and saw a reverse element sitting just 80 millimeters from the die. That element was holding material back, overworking the starch, and killing expansion. Moving that reverse element further upstream, and adding a forward conveying flight near the die, restored the light, crispy texture in a single changeover.
Same machine. Same barrel. Same die. Different screw. Different product.
This is the point we want you to internalize: when a product doesn’t hit spec, check the screw before you blame the recipe or the settings. If you want to understand exactly what happens inside the barrel as the material moves through, our twin screw extruder working principle guide walks through the five zones step by step.
Want help dialing in your screw? Our extrusion engineers can review your product spec and recommend a starting configuration. Talk to our team.
The Building Blocks: Types of Twin Screw Elements
Every screw profile is built from a small set of element types. Learn these four and you can read almost any configuration diagram.
Conveying Elements
Conveying elements are the workhorses. These are the classic self-wiping, twin-lead flights that move material forward through the barrel. Their pitch, usually expressed as a fraction of the screw diameter, sets how fast they convey and how much open volume they offer.
Wider pitch moves material faster and reduces fill. Narrower pitch moves it slower, which increases fill and residence time. Near the die, food processors often use lower-pitch conveying elements to build pressure and control the temperature profile just before shaping.
Kneading Blocks
Kneading blocks are the shearing and mixing elements. They’re made of offset discs, and the angle between adjacent discs, called the stagger or offset angle, is everything.
A small offset, like 30 degrees, behaves mostly like a conveyor with some mixing. A large offset, like 90 degrees, gives pure mixing with almost no conveying, so material just churns in place. Common offsets are 30, 45, 60, and 90 degrees, and manufacturers can also reverse the stagger to push material backward.
Here’s the tradeoff to remember: more offset means more shear and better dispersion, but also more energy and more heat. Kneading blocks are where most starch gelatinization and protein texturization actually happen.
Mixing and Distributive Elements
Distributive elements blend ingredients gently without the high shear of kneading blocks. Toothed and slotted elements split and recombine the melt streams, which is ideal for distributing a small amount of fat, color, or a heat-sensitive vitamin evenly without degrading it.
For high-meat pet food, where you need fresh meat and fat spread uniformly through a dough without destroying the protein, distributive elements are often the better choice over aggressive kneading blocks.
Reverse Elements
Reverse, or left-handed, elements are threaded in the opposite direction, so they push material backward against the forward flow. This does three things at once: it increases the degree of fill, it builds pressure, and it raises residence time.
Because of this, a reverse element is the fastest way to add specific mechanical energy to a process. It’s also how you create a pressure seal before the die or before a venting port. Reverse elements are usually short, around half a diameter long, because too much reverse flow can stall the machine.
Special Elements
A few specialty elements round out the toolkit. Wide-throat elements have a single lead and accept bulky, low-density feeds. Shearing disks deliver very high dispersive shear for tough materials. Transition and shouldered elements adapt between different element families. For food, the important thing is that every element is made from food-safe, hardened stainless steel, typically SUS 304 or 316, so it stays hygienic and wears slowly.
Here are the four core element types at a glance:
| Element | What It Does | Key Detail |
|---|---|---|
| Conveying | Moves material forward | Wider pitch moves faster and lowers fill |
| Kneading block | Shears and mixes in place | Offset angle (30 to 90 degrees) sets shear |
| Distributive mixing | Blends additives gently | Low shear, even distribution |
| Reverse | Pushes material backward | Builds pressure and raises SME |
Understanding L/D Ratio and Barrel Zones
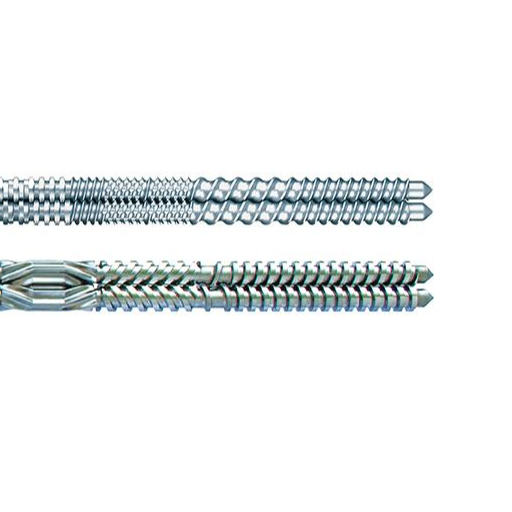
The length to diameter ratio, written as L/D, tells you how long the screw is relative to its diameter. A screw with a 32:1 L/D is thirty-two diameters long.
For food, L/D typically runs from about 20:1 to 32:1, with 25:1 the most common choice and longer barrels reaching 48:1 for high-cook applications like deep starch gelatinization. Plastics compounding often uses shorter, more aggressive profiles because those materials behave differently under shear.
What does more length actually buy you? More barrel zones. A longer screw can fit distinct feeding, melting, mixing, venting, and metering zones in sequence. It gives the material more residence time to cook and mix, which means better homogeneity and, usually, more shear heat. The tradeoff is cost and energy: every extra diameter of length is more steel, more heaters, and more residence time to manage.
A practical way to think about it: map your elements to your zones. Conveying elements handle feeding and venting. Kneading blocks live in the melting and mixing zones. A reverse element seals the boundary before the die. If you’d like the full picture on how co-rotating geometry behaves, our co-rotating vs counter-rotating guide covers the fundamentals.
How Screw Configuration Controls Specific Mechanical Energy
Specific mechanical energy, or SME, is the work the screws do per unit of material, expressed in kilowatt-hours per kilogram. It’s the single best number for judging how hard your process is working. The basic formula is SME equals screw speed times torque times motor power, divided by throughput.
SME matters because it’s where most of your cooking energy comes from in a directly expanded product. More importantly, it’s a dial you can turn with the screw alone.
Here’s how element choice moves SME. Reverse elements raise it, because material fights to move past them. Longer and narrower kneading blocks raise it, because they shear more. Tighter, more flow-restricting layouts raise it.
Forward conveying flights and wider pitch lower it. In controlled studies on high-moisture texturized soybean meal, researchers found that switching a kneading disc from a forward stagger to a reverse stagger, or narrowing the discs, reliably increased both the screw fill degree and SME. Reverse screw elements raised SME more than kneading blocks did, and a combination of the two raised it most of all.
One caution: SME is recipe-dependent, and the same SME value can still give you different textures. Higher screw speed can lower torque and fill even as shear drops viscosity, so SME can stay flat while the product changes. Configure the elements and the process together, not one in isolation.
Configuring the Screw for Different Foods
Now let’s get specific. Here are four common food applications and how to think about the screw for each.
Puff Snacks: Protect Expansion at the Die
Direct-expanded products like puffed corn snacks need low to moderate shear, with the melt kept as light as possible until it flashes at the die. The rule of thumb is to keep kneading blocks upstream and leave forward conveying flights near the die. Studies on corn and rice extrusion show radial expansion is highest when kneading blocks sit roughly 200 millimeters from the die, not jammed against it. When elements are placed right at the die, die temperature peaks but expansion drops.
High-Meat and High-Moisture Pet Food
High-protein, high-fat recipes are the twin screw’s sweet spot, because it handles a wider moisture window than a single screw. Here you lean on distributive and mixing elements to spread fresh meat and fat evenly without degrading the protein. The goal is homogeneity, not maximum shear. If you run a pet food production line, the screw is where premium nutrition gets built or lost.
Plant-Based Meat (TVP): Build Melt Pressure
High-moisture texturization needs a specific profile: forward conveying flights, then kneading blocks to melt and shear, then a reverse element to build the pressure that creates a fibrous, meat-like texture. This is the same sequence the soybean-meal studies describe, and it’s why getting the reverse element in the right place matters so much.
Modified Starch: Control Gelatinization Precisely
Pre-gelatinized starch needs tight control over both shear and temperature to hit a target viscosity window. Too little shear and it won’t gelatinize. Too much and you overshoot the viscosity and degrade the starch. A moderate-shear profile with carefully positioned kneading blocks is the starting point. Our modified starch extruder is built around this kind of precise, recipe-specific configuration.
Let me give you one more story to make this concrete. A pet food plant in Rotterdam switched from a standard kibble recipe to a premium, high-meat formulation. Their output dropped and their texture went grainy. The fix wasn’t more heat.
It was swapping half their kneading blocks for distributive mixing elements and widening the moisture window. Throughput recovered and the kibble came out dense and uniform. Two element changes, no new machinery.
Ready to test your recipe? A short pilot trial on a configured extruder is the fastest way to confirm texture and density before you commit. Request a pilot trial.
Food vs Plastics: What Changes in Screw Design
If you’ve read compounding literature, you’ll notice food screws look gentler. That’s deliberate.
Food processes favor shorter, less aggressive profiles because the goal is cooking and texturizing, not extreme dispersion. The L/D range is often longer for deep gelatinization, but the kneading intensity is lower, and fill degree is managed to protect nutrition and texture. Materials of construction shift too: food screws use food-safe, hardened stainless steel with self-wiping geometry so they stay hygienic and clean quickly between changeovers.
The self-wiping action matters more than people think. Because intermeshing, co-rotating flights wipe each other clean, there are no dead zones where product can sit, burn, and contaminate the next batch. That’s a food-safety feature as much as a quality one.
How to Specify a Screw Profile with Your Supplier
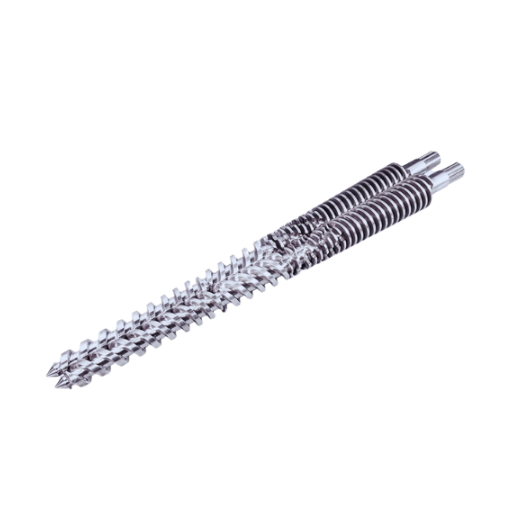
You don’t need to design a screw from scratch. You need to describe your product well enough that your supplier can. Here’s what to prepare.
First, define the product: what it is, the target texture and density, and the moisture window. Second, state your target output in kilograms per hour. Third, share any known constraints, like heat-sensitive ingredients or a need to run multiple products on one line.
Then ask for a pilot trial. Run your recipe on a configured machine, measure SME and product density, and adjust the elements based on what you see. Modular design is your friend here: start conservative with forward conveying and a few kneading blocks, then add a reverse element or lengthen a mixing section only if you need more work.
A final story. A startup making plant-based jerky approached a manufacturer with only a texture goal: chewy, with visible fibers, not spongy. The supplier started with a standard TVP profile, ran a pilot, and then tuned two things: the position of the reverse element and the number of kneading blocks. Three iterations later the texture matched.
The founders never had to understand every element on the shaft. They just had to describe the outcome and measure it.
For the full selection framework beyond the screw, our how to choose a twin screw extruder guide covers capacity, torque, and supplier evaluation.
FAQ
What is twin screw extruder screw configuration?
It’s the arrangement of modular screw elements, conveying flights, kneading blocks, mixing elements, and reverse elements, along two intermeshing shafts. The layout controls shear, mixing, pressure, and residence time.
What are the screw elements of a twin screw extruder?
The main types are conveying elements, kneading blocks, distributive mixing elements, reverse elements, and a few specialty elements like wide-throat flights and shearing disks.
What is L/D ratio in a twin screw extruder?
L/D is the screw’s length divided by its diameter. Food extruders typically run 20:1 to 32:1, with 25:1 the most common, and longer barrels for high-cook applications.
What is the difference between a kneading block and a reverse element?
A kneading block shears and mixes in place using offset discs. A reverse element is threaded backward to push material against the flow, which builds pressure and raises residence time and SME.
How does screw configuration affect specific mechanical energy?
Reverse elements and tight kneading blocks raise SME, while forward conveying flights and wider pitch lower it. Higher SME generally means more cooking and more shear, but the same SME can still produce different textures.
Can I change the screw configuration later?
Yes. Modular elements slide onto keyed shafts, so you can rearrange or replace them to change products or fix a texture problem without buying a new machine.
Conclusion
The screw is the recipe. Get the twin screw extruder screw configuration right and you control shear, mixing, residence time, and energy input, which is to say you control your product.
To recap: learn the four core element types and what each one does, match your L/D ratio and zones to your process, use SME as the number that tells you how hard the screw is working, and configure for the food you’re actually making. Puffs want gentle shear and kneading blocks kept away from the die. Pet food wants distributive mixing. TVP wants a reverse element to build melt pressure.
If you’re troubleshooting a texture problem or specifying a new line, start with the screw, not the settings. And if you’d like an expert eye on your profile, our engineers will review your product spec and recommend a starting configuration, then prove it in a pilot trial before you commit.
Request a consultation and let’s configure the right screw for your product.