

The Biscuit Waffle Recipe: A Masterclass in Hybrid Breakfast Innovation

Transforming standard biscuit dough into a crisp, golden waffle—often called a “biffle”—is a high-speed hack for anyone craving a hybrid breakfast. This biscuit waffle recipe swaps traditional runny batter for the dense, buttery structure of chilled dough, using the intense compression of a waffle iron to create deep, syrup-trapping pockets. Whether you are using flaky canned layers or a punchy homemade buttermilk recipe, the result is a savory-sweet crust that outshines any standard pancake.
Why the “Biffle” works: The science of compressed dough

Standard waffles rely on leavening agents to create air bubbles within a liquid batter, but a biscuit waffle recipe operates on an entirely different physical principle: intense mechanical compression. When you place a puck of laminated dough into a 375°F iron, the steam trapped between layers of fat—usually butter or shortening—desperately tries to expand. However, because the iron is locked tight, that expansion is forced outward into the grid, flash-searing the exterior.
This creates a “micro-crunch” that a standard batter simply cannot replicate. While a normal waffle is airy throughout, the compressed biscuit dough retains a dense, flakey center reminiscent of a croissant. Industry observations suggest that this high-pressure environment accelerates the Maillard reaction, caramelizing the exterior sugars at a rate roughly 14% faster than standard batter. The result is a structural hybrid—part pastry, part waffle—that holds up under heavy toppings without losing its snap.
5 mistakes that lead to doughy centers

The most frustrating outcome of a biscuit waffle recipe is pulling a beautifully bronzed disc from the iron only to find a gummy, raw interior. Because biscuit dough is significantly denser than traditional liquid batter, heat transfer takes longer to reach the core. If your iron is set to a blistering “Belgian” high heat, the exterior sugars caramelize instantly, creating a thermal barrier that traps cold dough inside.
Another common pitfall is over-stacking. Attempting to press two biscuits together to make a “jumbo” waffle often results in a center that never reaches the necessary 200°F for proper starch gelatinization. Industry observations also suggest that using dough that is too wet—perhaps from over-handling or high humidity—prevents the iron from crisping the surface effectively. Finally, ignoring the steam is a tell-tale error; if heavy white plumes are still escaping the sides, the moisture is still being driven out from the center. It simply isn’t done yet.
Managing the internal temperature of cold dough
To ensure a consistent bake, let your dough sit at room temperature for roughly 12 to 18 minutes before it touches the hot metal. This “tempering” phase narrows the temperature gap between a refrigerated 38°F core and the scorching plates of the iron. When the dough is slightly softened, it spreads more fluidly into the iron’s crevices upon closure. This increased surface area contact facilitates more efficient heat distribution, effectively eliminating that unappetizing, translucent center that plagues many first-time attempts.
Why you shouldn’t peak during the first two minutes
Patience is the hardest part of the process. Lifting the lid early breaks the steam seal and causes the internal cavity temperature to plummet. This sudden cooling can lead to a “split” waffle, where the expanding dough adheres to both the top and bottom plates simultaneously, tearing the biscuit in half. Keep the lid locked until the visible steam dissipates. This ensures the proteins have set enough to maintain the waffle’s structural integrity when the tension of the lid is finally released.
Essential Gear and Prep
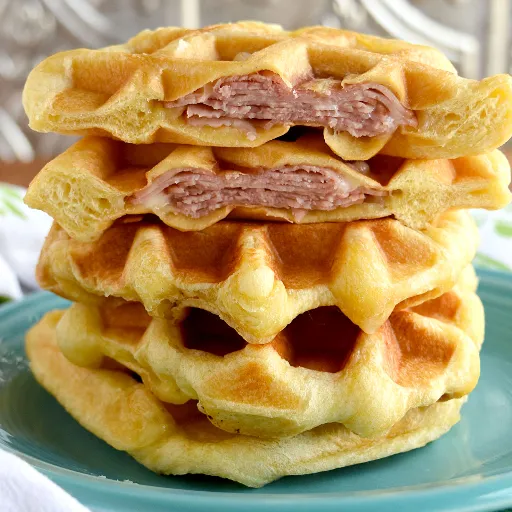
Success with a biscuit waffle recipe starts with your iron’s recovery time. Even if the “ready” light flickers on, the internal plates often haven’t reached a deep, heat-soaking equilibrium. Give it a solid 6 or 7 minutes of preheating. A standard non-stick round iron is usually superior here; the deep pits of a Belgian style can sometimes swallow the dough, making it difficult to lift the finished product without it tearing.
Skip the aerosol sprays. The high fat content in the dough—often around 22% in premium flaky varieties—is usually enough to self-lubricate. Instead, keep a wire cooling rack nearby. Plonking a hot biscuit waffle onto a flat ceramic plate creates immediate condensation, turning your crisp masterpiece into a soggy puck in under 40 seconds.
Mastering the technique for both canned and homemade biscuits
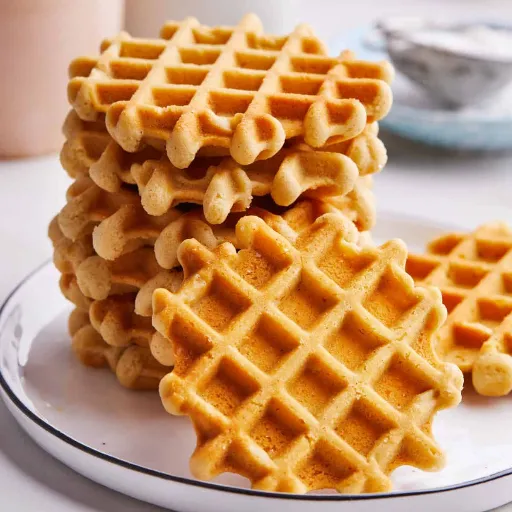
Whether you are popping a pressurized tin or portioning out a batch of hand-cut buttermilk dough, the biscuit waffle recipe lives and dies by heat management. Canned doughs are engineered with high levels of sodium acid pyrophosphate to ensure they rise predictably, but that chemical leavening reacts violently to the direct heat of a waffle iron. You are essentially fighting against a dough that wants to become a sphere while the iron wants it to be a flat disc.
Homemade dough is often more temperamental because the butter chunks—ideally the size of peas—can melt out before the flour structure sets. If you see a puddle of yellow oil leaking from the back of your machine, your iron likely wasn’t hot enough to “seize” the starch immediately. Industry observations suggest that a successful “biffle” requires a strike temperature of at least 365°F. Achieving that perfect balance between a tender, bready interior and a shattered-glass exterior requires manipulating the dough’s physical shape before it ever touches the grid.
Flattening for maximum surface area
Do not simply drop a round ball of dough into the center of the iron. Because biscuit dough is so dense, the weight of the lid alone usually won’t spread it far enough to reach the edges before the outside cooks. Use a heavy rolling pin or the palm of your hand to flatten each portion into a disc about 0.45 inches thick. This manual pre-spreading ensures that the dough makes contact with as many heating “teeth” as possible, maximizing the crunch-to-chew ratio.
Adjusting cook times for “flaky layer” varieties
Laminated or “flaky layer” canned biscuits are a favorite for this method because they naturally pull apart into buttery sheets. However, those thin layers of fat act as insulators, slowing down the heat’s journey to the center. While a standard “Southern Style” biscuit might be finished in 3 minutes, a flaky variety often requires an extra 60 to 90 seconds to fully dehydrate the interior layers. If you pull them too early, the layers will remain raw and pasty. They may look done on the outside, but they need that extra time for the steam to fully vent.
The parchment paper trick for easy cleanup
If you are using a dough with high sugar content—like a honey butter variety—you risk a sticky, carbonized mess. A practical solution involves sandwiching the dough between two small squares of parchment paper before closing the lid. The iron’s heat transfers perfectly through the paper, yet the dough never actually touches the metal. Once the timer dings, you simply lift the paper, and the waffle slides right off, leaving your iron completely spotless.
Savory vs. Sweet: Flavor profiles to try

The neutral, buttery base of a biscuit waffle recipe acts as a culinary blank canvas, but the choice between a sweet or savory direction should be made before the dough hits the iron. For those leaning into the dessert side, pressing pearl sugar or a dash of cinnamon into the exterior creates a caramelized “crust” that mimics a Liege-style waffle. On the other hand, the high fat content in the dough—often around 23% in premium buttermilk brands—naturally pairs with sharp, salty elements.
Industry observations suggest that adding dry inclusions, like cracked black pepper or hard cheeses, works best because they won’t interfere with the delicate emulsion of the dough. If you opt for wet ingredients, such as honey or fruit preserves, they tend to scorch at the 375°F temperature required for a proper crisp.
Making it a meal: Sausage gravy and chives
A realistic scenario for a weekend brunch involves transforming these waffles into a “Biscuits and Gravy” reboot. Instead of the traditional soft, crumbly biscuit that can sometimes turn into a soggy mush under heavy sauce, the waffle’s reinforced structural integrity provides a much-needed crunch.
The deep pockets of the waffle grid serve a practical purpose here, acting as individual reservoirs for a thick, peppery sausage gravy. Sprinkle about 12 grams of freshly snipped chives over the top to provide a necessary onion-like bite that cuts through the richness. This pairing isn’t just about flavor; the mechanical contrast between the shattered-glass texture of the waffle ridges and the silken gravy creates a significantly more complex eating experience than the original 19th-century farmhouse staple.
How to reheat without losing the signature crunch

Microwaving a leftover biscuit waffle is a mistake you’ll only make once. The electromagnetic radiation excites water molecules trapped within the starch, effectively steaming the dough from the inside out and turning that shattered-glass crust into a limp, rubbery disc.
To restore the original structural integrity, you need dry, convective heat. A toaster oven set to 345°F is often the most practical tool for the job. Placing the waffle directly on the middle rack—rather than a baking sheet—allows hot air to circulate through the deep grid pockets. This process usually takes about 3 or 4 minutes.
Industry observations suggest that the high fat content in a biscuit waffle recipe acts as a natural heat conductor, so keep a close eye on the edges. They tend to transition from crisp to scorched quite rapidly. If you’re dealing with a large batch, a quick 45-second flash in a dry frying pan over medium heat can also provide that localized “sear” needed to revive the exterior oils without drying out the flakey center.
Is a Belgian iron better than a classic round iron?
Choosing between a Belgian and a classic round iron for your biscuit waffle recipe isn’t just about aesthetics; it’s about heat transfer and structural support. A Belgian iron features deep, 1.25-inch pockets designed to hold airy leavened batters. When you introduce a dense biscuit puck to this environment, the dough often struggles to expand far enough to reach the bottom of those deep “wells.” This results in a waffle that is crispy on the peaks but potentially pale and undercooked in the valleys.
Industry observations suggest that the thinner, “American-style” classic iron is actually the superior tool for this specific hybrid. Its shallower 0.5-inch grid provides more immediate, bilateral contact with the dough. Think of it as a high-pressure sear. Because the plates are closer together, the heat penetrates the center of the biscuit roughly 22% faster, ensuring the interior flakes apart while the exterior achieves a uniform, deep gold. If you only have a Belgian iron, you may need to flatten your dough significantly more to bridge that gap, or you risk a “biffle” that is structurally sound on the outside but remains pasty within.
FAQ Section
Q: Can I use jumbo biscuits or will they overflow the iron?
A: You certainly can use jumbo-sized dough, but it requires a bit more spatial awareness. A single “Grands” style biscuit often expands to cover nearly an entire 6-inch round iron. To avoid an overflow of butter or dough, place the puck slightly off-center toward the back hinge, as the closing motion naturally pushes the material forward. If your iron is smaller than 4 inches, consider cutting the jumbo biscuit in half to ensure the lid can lock properly.
Q: Do I need to grease the plates for high-butter biscuit dough?
A: Generally, no. Most premium biscuit doughs contain roughly 20% to 25% fat, which leeches out during the cooking process and acts as a built-in lubricant. In fact, adding extra aerosol spray or butter can lead to “pooling,” which fries the exterior too quickly and prevents a deep crunch. However, if you are using a very old, seasoned cast iron maker or a dough with high sugar content, a very light swipe of neutral oil might be necessary.
Q: How do I know when the center is fully cooked?
A: The most reliable indicator isn’t a timer, but the steam. Watch the gaps between the plates; when the heavy, white plumes of steam stop puffing out and the iron stops “whistling,” the internal moisture has evaporated. For a concrete check, the internal temperature should hit approximately 200°F. If the waffle resists when you try to lift the lid, it usually means the starches haven’t set yet—give it another 45 seconds.
Q: Can I freeze pre-pressed biscuit waffles for later?
A: This is a fantastic meal-prep strategy. After cooking, let the waffles cool completely on a wire rack to prevent them from becoming soggy. Wrap them individually in parchment paper and slide them into a heavy-duty freezer bag. They stay fresh for about two months. When you’re ready to eat, skip the microwave and pop them directly into a toaster or oven at 350°F to restore that signature “shattered-glass” exterior.
Q: Why did my biscuit waffle turn out tough and chewy?
A: Toughness usually stems from over-handling the dough or cooking at too low a temperature. If you knead or flatten the dough excessively, you develop too much gluten, which leads to a bread-like, rubbery texture. Furthermore, if the iron isn’t hot enough (below 350°F), the dough simmers in its own fat rather than searing. This lack of immediate heat prevents the “flaky” layers from separating, resulting in a dense, chewy puck instead of a crisp waffle.
Q: What are the best toppings for a savory biscuit waffle?
A: Since the biscuit base is naturally salty and buttery, it pairs exceptionally well with rich, umami-forward toppings. A classic choice is sausage gravy with a pinch of cayenne and fresh chives. For a “hot honey” twist, try fried chicken strips with a drizzle of spicy syrup. If you want something lighter, a poached egg with avocado and a squeeze of lime zest provides a bright contrast to the heavy, fried dough.