
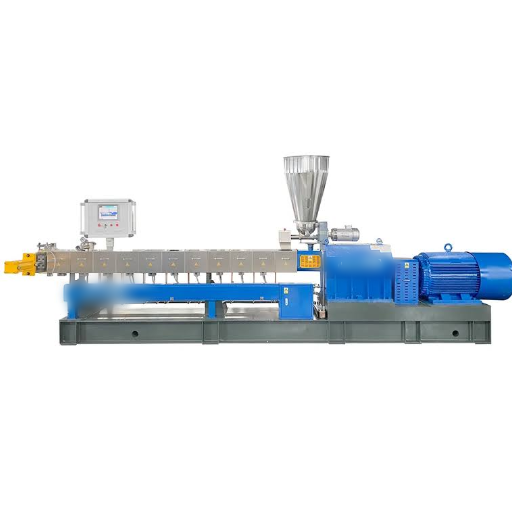
Twin Screw Extruder Troubleshooting: Common Problems & Fixes

Almost every twin screw extruder problem you’ll hit on a food line, whether it’s surging output, motor overload, high melt temperature, screw wear, or die clogging, has a specific cause and a specific fix. This guide walks you through each fault, symptom by symptom, so you can diagnose the problem fast and get production running again.
Priya, a shift supervisor at a snack plant in Gujarat, watched her corn puff line turn out dense, hard pellets one Tuesday afternoon. Her first instinct was to blame the recipe. It wasn’t the recipe. The screw flights had worn past their limit, and the line could no longer build the pressure and temperature it needed to expand the starch. She found the real cause only after reading the product, not the ingredient list.
That’s the difference twin screw extruder troubleshooting makes. Most operators jump to the wrong conclusion because they don’t have a structured way to trace a symptom back to its root cause. In this article, you’ll learn how to read the product, establish a process baseline, and fix the most common faults on food extrusion lines, from snacks and pet food to modified starch and fish feed.
Key Takeaways
- Roughly 9 in 10 extruder surging problems start in the feed and transition zones, not the metering section, so fix feeding and melting before touching the screw design.
- Read the product first: dull, loose pellets point to screw wear, while uneven size and blocked holes point to a die head fault.
- Replace a screw when edge wear passes 2 mm, but repair minor wear under 0.5 mm by welding a wear-resistant alloy and polishing.
- Run near 80 to 85 percent of maximum torque to avoid over-torque stalls on starve-fed twin screw extruders.
- Always cool the barrel below 100°C and lock out the machine before inspecting any mechanical fault.
What Is Twin Screw Extruder Troubleshooting?
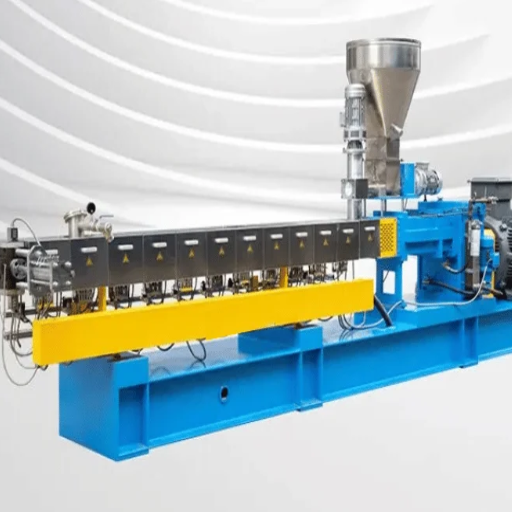
Twin screw extruder troubleshooting is the systematic process of diagnosing and correcting faults on a twin-screw extrusion machine, such as surging output, motor overload, poor melt quality, screw wear, die clogging, or temperature instability, by identifying a symptom, tracing its root cause, and applying the right corrective action.
A twin screw extruder fails in predictable ways. The screws run at tight clearances under high shear, so wear, feed instability, and temperature drift show up as specific product and machine symptoms. The key discipline is to establish a baseline of normal operation, then spot the first measurement that leaves normal. That first deviation, not the most obvious one, points to the real fault.
How to Diagnose a Twin Screw Extruder Fault
Good twin screw extruder troubleshooting starts before anything goes wrong. You need three things: a baseline, the ability to read the product, and a safe inspection routine.
Establish a Process Baseline
Record these values while the line runs well: feed rate, screw speed, motor load or torque, zone temperatures, die head pressure, and product quality. Without a baseline, you can’t tell a normal rise in pressure from a problem. A steady climb in motor current or melt temperature only matters if it gets steeper or approaches a limit, so compare everything against your recorded normal.
Read the Product First
The fastest diagnostic on a food line is what the product looks like. Dull, loose, or crumbly pellets usually mean screw wear. Uneven particle size or some die holes not discharging usually mean a die head fault. Hard, dense product that won’t expand points to low pressure and temperature, often from a worn screw or low moisture. Streaks and burnt specks point to poor mixing or material stagnation.
Safety Before Inspection
Lock out and tag out the machine first. Let the barrel cool below 100°C before opening it. Use copper tools so you don’t scratch the screw surfaces. And never reach into the feed port while the screws can turn. Skipping these steps turns a fixable fault into an injury.
If you’d rather skip the guesswork, our engineers can walk you through a diagnosis on your line. Request a free extrusion diagnostic →
Troubleshooting Table: Symptoms, Causes & Fixes at a Glance
Use this table to locate your fault quickly, then read the matching section below for the full diagnosis.
| Symptom | Likely Causes | Corrective Action |
|---|---|---|
| Surging or unstable output | Feed-zone slip-stick, hopper bridging, starve-feeding, worn screw, die blockage | Stabilize feed, adjust zone 1 temperature, raise backpressure, restore clearances |
| Motor overload or high power | Overfeeding, insufficient preheat, foreign objects, blocked die, worn elements | Reduce speed and feed, raise barrel temperature, clear blockages |
| Melt temperature too high | Shear heating, aggressive kneading blocks, screen or die restriction | Verify controls, reduce kneading severity, clear restriction |
| Poor melt quality | Low temperature, low backpressure, wrong screw design | Raise temperatures, add backpressure, adjust screw configuration |
| Die clogging or strand breakage | Blocked holes, unstable die temperature, worn die holes | Clean with soft tools, stabilize die temperature, restore holes |
| Feeding problems | Hopper bridging, low bulk density, side-feeder limits | Add vibrators or agitators, adjust side-feeder |
| Screw and barrel wear | Abrasive fillers, foreign metal, overload bending | Repair under 0.5 mm, replace over 2 mm |
| Vent flooding or vacuum loss | Melt-seal pressure drop, die backup, blocked or leaking lines | Rebalance melt seal and feed, clean and reseal lines |
Output & Power Faults: Surging and Motor Overload
Surging and motor overload are the two faults operators call about most often, and they often share a root cause in the feed section.
Surging and Unstable Output
Surging is inconsistent flow. You’ll see it as variation in die pressure, motor load, or product dimensions. Around 90 percent of surging originates in the feed and transition sections, yet most operators wrongly focus on the metering section.
Common causes include slip-stick in the feed zone, a partially bridged feed throat, starve-feeding, a melting zone that shifts in the transition section, and a worn screw. To fix it, increase screw cooling or reduce zone 1 temperature to stop slip-stick. Stabilize the feed and remove any bridging in the hopper. For a starve-fed line, lower the screw speed or raise the feed rate and backpressure. If the screw is worn, restore the clearances before changing anything else.
Motor Overload and High Power Draw
Motor overload comes from excessive torque on the screws. The typical triggers, per Kerke’s twin screw extruder troubleshooting guide, are overfeeding at a given screw speed, insufficient preheating, foreign objects in the screws, a blocked die or screen, or worn gear and bearing surfaces.
Marcus, a maintenance lead at a pet food facility in Texas, kept tripping the drive on a filler-heavy kibble run. The cause wasn’t a bad motor. The line was running too slow for a starve-fed screw, so the screw filled completely and over-torqued. Running near 80 to 85 percent of maximum torque and raising the preheat cleared the trips the same day.
To correct an overload, reduce screw speed gradually and lower the feed rate. Clear any blocked screen pack or die. Raise the barrel temperature if preheating was too low, and verify the material matches the machine’s capacity. If the problem persists, inspect the gearbox and bearings for friction.
Temperature & Melt Quality Faults
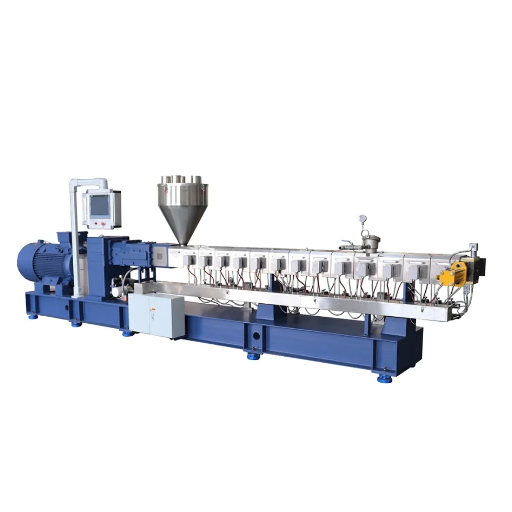
Temperature faults are tricky because the barrel setpoint is not the actual melt temperature. You have to watch both.
Melt Temperature Too High
When the barrel heaters are off and the cooling is running but the temperature keeps climbing, the heat is coming from shear, not the heaters. As USEON’s guide on high melt temperature explains, this is mechanical energy being turned into heat inside the screw.
Check the temperature control system first, then review the screw configuration. Overly aggressive kneading blocks generate excess heat, while insufficient shear causes poor melting. Also check the screen pack and die for blockage, since any flow restriction raises the work done on the material.
Melt Temperature Too Low or Unstable
If the feed or transition zone runs too cold, pellets won’t fully melt, and unmelted material will clog the metering section. Raise the temperature in the overheating zone and the zones before it. If the reading itself is wrong, check for loose thermocouple wiring or a failed solid-state relay.
Poor Melt Quality and Mixing Defects
Poor mixing shows up as unmelted particles, streaks, or burnt specks. It’s usually caused by low melt temperature, low die backpressure, the wrong screw design, or a plugged mixing head. Raise the barrel temperatures, add screens to increase backpressure, and clean the screw. To separate causes, distinguish composition variation, which comes from feeding, from dispersion variation, which comes from mixing.
Product Defects: Die Clogging, Strand Breakage & Expansion
On a food line, the die is where the product takes its final shape, so die faults show up as visible product defects.
Die Clogging and Strand Breakage
Uneven particle size or holes that won’t discharge signal a die head fault. Blocked holes usually hold scorched material or impurities. Unstable die head temperature causes the material to stick. Over time, die holes wear, and once a hole has grown more than 10 percent over its original diameter, it counts as increased wear.
Clean blocked holes with a tool slightly smaller than the hole, and never force it. If burnt material is stuck, soak it in hot water first. Minor hole wear can be repaired by electroplating a wear-resistant alloy onto the inner wall. Severe wear means replacing the template. Keep the die head temperature stable, around 120 to 140°C for many food applications, to prevent sticking.
Poor Expansion in Snacks and Fish Feed
Expansion failure is a product-quality signature you should learn to read. If your puffs come out hard and dense, or your floating fish feed starts to sink, the machine isn’t building enough pressure and temperature at the die. The usual culprits are screw wear and low moisture. Restore the clearances and check your moisture, around 10 to 15 percent for dry extrusion and 18 to 25 percent for wet extrusion.
Worn screws and barrels are the parts we replace most often for our customers. Get a spare-parts quote for your twin screw extruder →
Feeding, Screw Wear & Mechanical Faults
Feeding Problems: Bridging and Unstable Feed
Feeding faults starve the screw and ripple into every other symptom. Hopper bridging happens when material arches over the feed opening, and low-bulk-density powders make it worse. Fit vibrators or mechanical agitators to break the arch, and clean the feed channel. For fine fillers and multi-component feeding, a vacuum-assisted, water-cooled side feeder stabilizes the flow.
Screw and Barrel Wear
Screw wear is the root cause behind many symptoms that look like something else. Dull product, reduced output, weak motor current, and poor expansion all trace back to worn flights. Abrasive fillers like calcium carbonate and hard starches accelerate wear, and foreign metal objects can bend a screw on overload.
Check screw wear at 3,000 hours and again at 6,000 hours to learn your wear rate. Repair minor wear under 0.5 mm by welding a wear-resistant alloy and polishing back to shape. Replace the screw when edge wear passes 2 mm, and restore the screw-to-chamber clearance to 0.1 to 0.3 mm on reassembly, per foodextrusionmachines.com’s screw and die fault guide. Since screws wear faster than barrels, check the barrel and replace it after the second screw change.
Vent, Vacuum and Degassing Problems
Vent flooding, where material blows out of the vacuum port, usually comes from a melt-seal pressure drop or die backup. Check for melt viscosity changes, adjust die pressure, and make sure no kneading elements sit below the vacuum port. If you can’t reach vacuum, check for blocked or leaking lines and worn O-rings or seals.
Noise, Vibration and Startup Failure
Unusual noise usually means a foreign object, misalignment, or a loose foundation. Reduce speed, tighten fasteners, and check screw alignment. If the screw won’t turn at startup, confirm power and breakers, ensure the barrel reached its heat-soak temperature, and check the gearbox oil pump. If the torque limit was exceeded, reset and re-engage the torque converter, then bring the screw speed up slowly without feeding material.
Food Safety & Preventive Maintenance
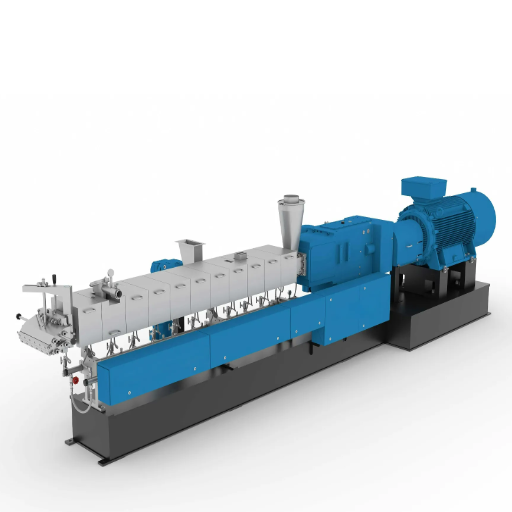
Troubleshooting a food line isn’t finished when the machine runs again. A fault can create a food-safety risk, so you need to document and correct it properly.
Corrective Action Documentation
Under HACCP and FSMA, a process deviation like a temperature fault or a mechanical failure should trigger a corrective action record. Note the fault, the cause, the fix, and any affected product. Use food-grade lubricants, NSF H1 rated, for any repair that could contact food. Sanitize contact surfaces after a mechanical repair before you resume production.
Turn Fixes Into a Preventive Program
The team at a modified starch facility in the Philippines spent months firefighting a recurring die clog caused by carbonized residue. The fix wasn’t a better cleaning tool. It was a preventive schedule: daily die head cleaning, weekly lubrication checks, and monthly disassembly to replace worn parts. Once they switched from reactive to preventive, the clogging stopped recurring.
That’s the real payoff of twin screw extruder troubleshooting. Every fault you fix today should feed tomorrow’s maintenance checklist. For a complete preventive program, see our twin screw extruder maintenance guide, which pairs with this article to keep your line running between fixes. You can also review how twin screw extruders work to understand the zones behind each fault.
FAQ
What are the most common twin screw extruder problems?
The most common are surging output, motor overload, high melt temperature, screw wear, die clogging, feeding problems, and vent flooding. Each has specific causes you can trace with a process baseline and product inspection.
Why is my twin screw extruder surging?
Surging usually comes from the feed and transition zones. Look for feed-zone slip-stick, hopper bridging, starve-feeding, or a worn screw, then correct feeding and restore clearances before touching the screw design.
Why is my extruder motor overloaded?
Overfeeding at a given screw speed is the most common trigger, followed by insufficient preheating, foreign objects, and blocked dies or screens. Reduce speed and feed, raise preheat, and clear blockages.
Why is my extruder melt temperature too high?
If heaters are off but temperature keeps rising, the heat is coming from shear. Review the screw configuration and check for a blocked screen or die that raises the work on the material.
How do I unclog a twin screw extruder die?
Clean blocked holes with a tool slightly smaller than the hole, and soak burnt material in hot water first. Keep the die temperature stable, and replace the template if holes have worn more than 10 percent.
What causes screw wear and when should I replace the screw?
Abrasive fillers and foreign metal objects cause wear. Repair minor wear under 0.5 mm by welding, and replace the screw when edge wear passes 2 mm or output drops about 10 percent.
Conclusion
Twin screw extruder troubleshooting comes down to a few habits that separate fast recoveries from long, expensive shutdowns. Read the product before you read the recipe. Establish a baseline so you can spot the first deviation. Trace every symptom, surging, overload, temperature, wear, or clog, back to its root cause instead of guessing.
Remember the essentials: around 9 in 10 surging problems start in the feed and transition zones, replace a screw past 2 mm of edge wear, and run near 80 to 85 percent of maximum torque. Cool the barrel below 100°C and lock out before you inspect.
When the fault is beyond a quick fix, you don’t have to solve it alone. Shandong Loyal Industrial builds the twin screw extrusion lines and knows them inside out. Contact our extrusion engineers for diagnostic support and spare parts → We’ll help you find the real cause and get your line back to full output.