
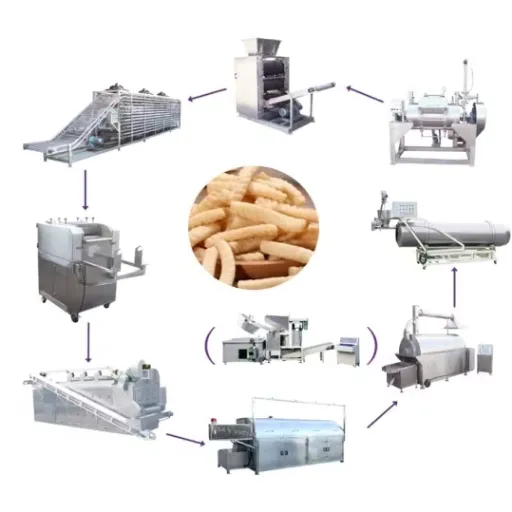
Snack Pellet Production Process: From Raw Materials to Finished Snack

Snack pellets are made in two stages: first, starches and flours are mixed, extruded, shaped, and dried into a dense, shelf-stable half-product; then the pellets are expanded by frying, baking, air popping, or roasting and finished with seasoning. This two-stage snack pellet production process gives manufacturers flexibility, long shelf life, and efficient global distribution.
That flexibility is why producers from India to Africa to Southeast Asia now run pellet lines instead of only traditional snack equipment. Yet many new operators misunderstand the process. They treat pellet production like direct expansion and underestimate the role of moisture control, gelatinization, and drying. When one stage is off, the final snack cracks, expands unevenly, or absorbs too much oil.
In this guide, you’ll learn every step of the snack pellet production process with real parameters, equipment considerations, and troubleshooting tips. Whether you are evaluating your first line or optimizing an existing one, this article will help you produce consistent, high-quality pellets at scale.
Key Takeaways
- Snack pellets are semi-finished, shelf-stable intermediate products with a 12–24 month shelf life.
- The production process has two stages: pellet manufacturing (mixing → extrusion → drying) and finishing (expansion → seasoning → packaging).
- Final dried pellet moisture should reach 8–12%; frying temperature is typically ~190°C with an expansion ratio of 3–4×.
- Twin-screw extruders now dominate about 58% of snack pellet processing because they offer better control and recipe flexibility.
- The global snack pellets market was valued at approximately USD 3.35 billion in 2025 and is growing at 4.3–5.8% CAGR.
What Are Snack Pellets?
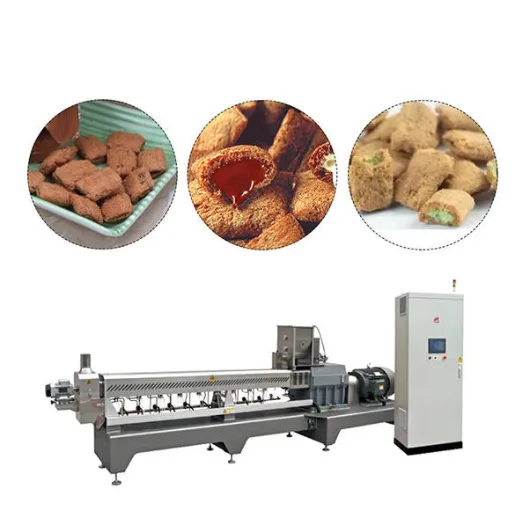
Snack pellets are dense, non-expanded intermediate products made primarily from starches, grains, and plant-based ingredients. They are often called “half-products” because they require a second step, expansion, before they become ready-to-eat snacks.
The key advantage is separation. A producer can manufacture pellets in one facility, store them for months, ship them efficiently, and expand them later in a different location. This is very different from directly expanded snacks, where extrusion and expansion happen in a single continuous step.
Dried pellets are compact. One shipping container can hold roughly five times more pellets than finished fried snacks. That density reduces transport costs and gives brands flexibility to respond to regional flavor trends without rebuilding inventory from scratch.
Snack pellets also support a wide range of end products. The same base pellet can become a fried chip, a baked low-fat snack, or an oil-free air-popped product. This versatility is one reason the global snack pellets market reached approximately USD 3.35 billion in 2025 and continues to grow at 4.3–5.8% CAGR, according to Market Research Future.
Want to see how the full production line fits together? Read our complete guide to 2D 3D pellet production lines for equipment selection and layout advice.
The Complete Snack Pellet Production Process
The snack pellet production process can be divided into ten clear steps. Steps 1–6 produce the semi-finished pellet. Steps 7–10 turn that pellet into a finished retail snack.
| Stage | Step | Purpose |
|---|---|---|
| Pellet manufacturing | 1. Raw material selection | Choose starches, flours, and additives for target texture |
| 2. Mixing | Hydrate and homogenize the dough | |
| 3. Extrusion and cooking | Gelatinize starch and form a plasticized mass | |
| 4. Shaping and cutting | Create 2D or 3D pellet shapes | |
| 5. Drying and cooling | Reduce moisture for shelf stability | |
| 6. Packaging and storage | Protect pellets for global distribution | |
| Finishing | 7. Expansion | Fry, bake, air pop, or roast to create texture |
| 8. Seasoning | Apply oils, powders, and flavors | |
| 9. Cooling | Stabilize texture before packaging | |
| 10. Final packaging | Preserve crispness and shelf life |
Each step depends on the previous one. A mixing error changes extrusion behavior. Poor extrusion cooking leads to uneven expansion. Inadequate drying causes microbial risk and broken pellets during frying.
That is why operators treat pellet production as an integrated system, not a series of independent machines.
Mini-story: Maria, a snack producer in Nairobi, installed a small pellet line in 2024. Her first batches cracked during frying. After testing, she discovered her dryer was set too high, forcing surface moisture out before the center could equalize. By lowering the drying temperature from 70°C to 55°C and extending drying time, she cut breakage by 60% and stabilized her expansion ratio.
Step 1: Raw Material Selection and Preparation
The foundation of every pellet is starch. Common raw materials include potato starch, corn starch, wheat flour, cassava or tapioca starch, and rice flour. Producers also add modified starches, proteins, fibers, emulsifiers, salt, and colorants to control texture, nutrition, and appearance.
Ingredient quality matters. Variable starch granule size or moisture content in incoming flour will change dough behavior in the extruder. Most manufacturers screen raw materials and standardize moisture before mixing.
Recipe design depends on the final product:
- 2D flat pellets (rings, wheels, papad) usually rely on potato or tapioca starch for a clean, crunchy texture.
- 3D shaped pellets (bugles, cones, pillows) often use a blend of wheat and corn flour for structural strength during compound shaping.
- Health-focused pellets may include lentil, chickpea, or ancient grain flours for higher protein and fiber.
There are practical limits. Too much fat lubricates the dough and reduces the friction needed for cooking in single-screw extruders. Excess fiber can interrupt the starch matrix and create rough texture or die blockage. Most formulations keep fat below 5–7% and fiber below 3–5% unless the extruder and die are specifically designed for high-fiber recipes.
Step 2: Mixing and Dough Conditioning
Mixing brings dry ingredients and water together into a uniform dough. The goal is consistent hydration and distribution of additives. Batch mixers are common for small lines. Continuous mixers are used for high-capacity operations.
Target dough moisture for most snack pellets is 25–35%. Lower moisture creates a drier dough that generates more frictional heat in the extruder. Higher moisture reduces mechanical cooking and may require a longer extruder barrel or additional thermal input.
After mixing, the dough should rest briefly. This conditioning step allows water to fully penetrate starch granules. Some lines use a pre-conditioner that adds steam and water while feeding the extruder, which improves gelatinization and throughput.
Operators check dough consistency by hand or with simple tools. A dough that is too wet will stick in the die. A dough that is too dry will not cook evenly and may cause surging or excessive wear on the extruder screws.
Step 3: Extrusion and Cooking
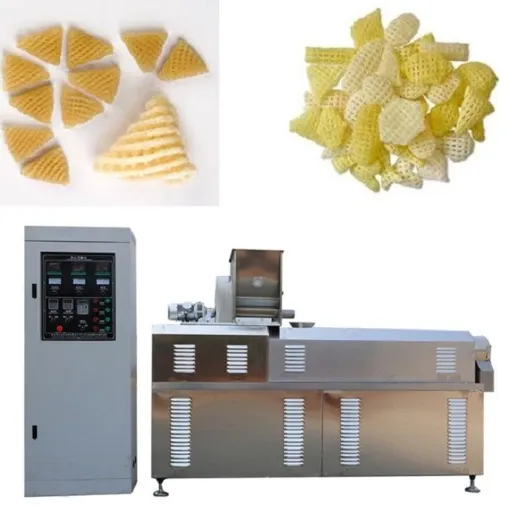
Extrusion is the heart of the snack pellet production process. The dough is forced through a heated barrel by one or more screws. Pressure, shear, and heat gelatinize the starch and transform the mixture into a plasticized mass.
There are two main approaches:
Hot Extrusion
In hot extrusion, the raw dough is cooked inside the extruder barrel. Temperatures typically reach 90–120°C. Friction and external heating gelatinize the starch. The cooked mass is then pushed through a forming die. Hot extrusion is used for most cereal-based and multigrain pellets.
Cold Extrusion
Cold extrusion skips the cooking step. It is used for pre-cooked materials, especially potato-based formulations that use potato flakes or granules. The dough is simply kneaded and formed into pellets at lower temperatures. This method is common for potato crisps-style pellets and certain prawn crackers.
Modern lines increasingly use twin-screw extruders. According to Future Market Insights, twin-screw extruders now account for about 58% of snack pellet processing methods. They offer better mixing, precise temperature control, higher throughput, and more recipe flexibility than single-screw extruders. Single-screw extruders remain popular for simpler 2D products and lower capital budgets.
Key extrusion parameters include:
- Screw speed: typically 200–600 RPM depending on diameter and product
- Barrel temperature profile: usually 90–120°C across zones
- Die pressure: varies by product but often 20–80 bar
- Residence time: typically 20–60 seconds
- Moisture after extrusion: 20–25%
Proper gelatinization is essential. Under-cooked starch will not expand well during frying. Over-cooked starch can become too elastic, causing die swell and shape distortion.
Need help selecting the right extruder for your product? Our snack pellet production lines include configurable single-screw and twin-screw options for 2D, 3D, and hybrid production.
Step 4: Shaping and Cutting
After extrusion, the plasticized mass passes through a die to create the desired shape. The type of shaping system depends on whether the product is 2D or 3D.
2D Pellet Shaping
Flat 2D pellets are produced by direct die extrusion followed by rotary cutting or slitting. A continuous ribbon exits the die and is cut into uniform pieces. Common 2D shapes include:
- Rings and wheels
- Sala chips and strips
- Squares and tubes
- Papad and fryums
3D Pellet Shaping
Three-dimensional pellets require more complex forming. The extrudate may be sheeted, embossed, laminated, or molded using rotary moulders. Multi-layer molding can create two-tone or filled products. Common 3D shapes include:
- Bugles and cones
- Pillows and shells
- Pani puri balls
- Goldfish and animal shapes
Die design is critical. Small changes in die land length, outlet geometry, or cooling affect expansion, surface texture, and final appearance. Dies wear over time, especially with abrasive formulations containing salt or fiber. Regular inspection and replacement maintain product consistency.
Changeover between shapes typically takes 30–90 minutes depending on line complexity. Modular die systems and quick-release cutters reduce downtime.
Step 5: Drying and Cooling
Drying is one of the most important steps in the snack pellet production process. It transforms the soft extruded piece into a hard, dense, shelf-stable pellet.
The drying process usually has multiple stages:
- Pre-drying: removes surface moisture gradually
- Drying: reduces internal moisture to target level
- Stabilization: equalizes moisture throughout the pellet
- Cooling: brings pellets to ambient temperature before packaging
Typical drying parameters:
| Parameter | Typical Range |
|---|---|
| Drying temperature | 45–60°C |
| Drying time | 3–5 hours |
| Final pellet moisture | 8–12% |
| Air velocity | Controlled by zone |
Pani puri and other thin-wall 3D products often target the lower end, around 8%, to ensure crisp expansion. Thicker 2D pellets may tolerate 10–12% moisture.
Case hardening is a common drying defect. It happens when the surface dries too quickly, forming a hard shell that traps moisture inside. The pellet may look dry but will expand poorly or crack during frying. The solution is lower initial temperature, slower airflow, or longer drying time.
Cooling after drying stabilizes the pellet structure. Vibrating cooling conveyors help separate sticking pieces and reduce temperature before packaging.
For a deeper look at dryer selection, see our guide on industrial food drying solutions and how they integrate with pellet lines.
Step 6: Packaging and Storage of Semi-Finished Pellets
Once dried and cooled, pellets are packaged as semi-finished products. They are not yet ready to eat, but they are stable enough for storage and transport.
Dried pellets have a shelf life of 12–24 months when stored properly. Packaging typically uses multi-wall paper bags, polypropylene woven bags, or bulk containers. The key is moisture protection. Even a small increase in ambient humidity can cause pellets to absorb water, leading to mold or poor expansion later.
The logistics advantage is significant. Because dried pellets are dense, a single shipping container holds roughly five times more product than an equivalent volume of finished fried snacks. That reduces freight cost per kilogram and allows brands to expand products closer to the end market.
This is why many global snack companies centralize pellet production in large, efficient plants and operate smaller regional frying and seasoning facilities.
Mini-story: A fryums exporter in Gujarat switched from shipping finished fried products to shipping dried pellets in 2023. Freight cost per kilogram dropped by nearly 40%. The company also noticed fewer breakages in transit because dried pellets are harder and more durable than finished snacks. The regional partner now fries and seasons locally, responding faster to local taste preferences.
Step 7: Expansion: Frying, Baking, Air Popping, or Roasting
Expansion is the moment the half-product becomes a snack. Rapid heating turns trapped moisture into steam. The steam pressure expands the gelatinized starch matrix, creating the light, crispy structure consumers expect.
Frying
Frying is the most common expansion method. Pellets are immersed in hot oil, typically around 190°C, for a few seconds to one minute. The rapid heat transfer causes the pellet to expand 3–4 times its original size.
After frying, excess oil is removed on a vibratory de-oiling conveyor or centrifuge. Oil content in the final product depends on pellet density, frying time, and de-oiling efficiency.
Hot-Air Expansion (Air Popping)
Air popping uses hot air instead of oil. The pellet is heated in a controlled airflow until it expands. This method produces snacks with no added fat, making it popular for health-focused products. According to Snack Creations, air-popped pellets can contain about 33% less fat than traditional potato crisps.
Baking
Baking uses dry heat in an oven to expand the pellet. It produces a lower-fat snack with a different texture than frying. Baking is often used for multigrain or vegetable-based pellets.
Roasting and Salt Roasting
Roasting uses dry heat, sometimes with salt as a heat transfer medium. It is used for specialty products and regional snacks.
Each expansion method affects the final flavor, texture, oil content, and color. Producers choose the method based on target market positioning and equipment availability.
Want to add frying capacity to your pellet line? Explore our fried snack production line options for continuous fryers, de-oilers, and flavoring systems.
Step 8: Seasoning, Cooling, and Final Packaging
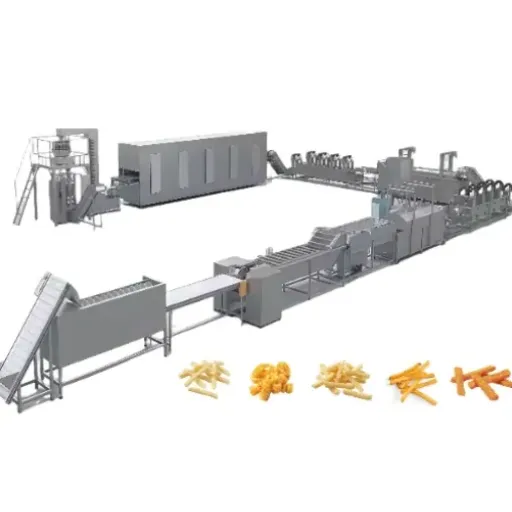
After expansion, the snack moves to seasoning. Flavor is applied while the product is still warm and porous, which helps oils and powders adhere evenly.
Common seasoning methods include:
- Drum seasoning: pellets tumble in a rotating drum while oil and powder are sprayed
- Slurry application: oil and flavor are mixed and sprayed as a liquid
- Powder dosing: dry seasoning is dusted onto an oil-coated surface
Oil content, seasoning particle size, and drum speed all affect coating uniformity. Operators adjust these parameters based on product shape and flavor type.
After seasoning, the product is cooled to room temperature. Warm snacks packaged immediately will condense moisture inside the bag, causing sogginess and shortened shelf life.
Final packaging usually includes nitrogen flushing and a moisture barrier film. This protects crispness and extends retail shelf life.
Quality Control and Common Defects
Consistent quality requires testing at multiple points in the snack pellet production process.
Key Quality Checkpoints
| Checkpoint | What to Measure | Typical Target |
|---|---|---|
| Incoming raw materials | Moisture, particle size, purity | Within specification |
| Mixed dough | Moisture, homogeneity | 25–35% moisture |
| Extrudate | Temperature, shape consistency | 90–120°C, uniform shape |
| Dried pellets | Moisture, bulk density | 8–12% moisture, ~600 kg/m³ |
| Expanded snack | Expansion ratio, oil content, color | 3–4× expansion, target oil % |
| Finished pack | Seal integrity, weight, shelf life | Within label claim |
Common Defects and Corrections
| Defect | Likely Cause | Correction |
|---|---|---|
| Cracked or broken pellets | Too low moisture, over-drying, rough handling | Increase dough moisture; reduce drying temperature; check conveyors |
| Uneven expansion | Uneven moisture; worn die; temperature fluctuation | Improve drying uniformity; inspect die; stabilize fryer temperature |
| Excessive oil absorption | Low pellet density; over-frying; damaged structure | Adjust drying target; reduce frying time; handle pellets gently |
| Blistering | Surface moisture too high before frying | Extend drying or stabilization; lower initial frying temperature |
| Pale color | Under-gelatinization; low frying temperature | Increase extrusion cooking; verify fryer setpoint |
| Over-browned color | Over-gelatinization; high sugar content; hot frying | Reduce extrusion temperature; adjust recipe; lower fryer temperature |
| Die blockage | High fiber/fat; dough too dry | Adjust formulation; increase moisture; pre-screen materials |
| Surging output | Uneven feed; worn screw; pressure fluctuation | Check feeder consistency; inspect screw and barrel |
A simple fry test is one of the most useful quality tools. Operators take a small sample of dried pellets, fry them under standard conditions, and evaluate expansion, texture, and color. This test catches problems before a full batch is packed and shipped.
Sustainability and Efficiency Benefits
The snack pellet production process offers several sustainability advantages compared to fully centralized snack manufacturing.
Reduced transport emissions. Shipping dense dried pellets instead of finished snacks reduces freight volume and fuel consumption. One container of pellets can replace several containers of finished product.
Lower waste. Pellets have a long shelf life, so producers can manage inventory with less spoilage. Defective or off-spec pellets can often be reworked into the mixer instead of discarded.
Energy flexibility. Because expansion happens separately, producers can use smaller, more efficient fryers or ovens located near markets. They can also choose air popping or baking to reduce oil use.
Oil recycling. In frying operations, oil can be filtered and reused. Modern continuous fryers include integrated filtration systems that extend oil life and maintain product quality.
Mini-story: A co-manufacturer in Poland began producing air-popped lentil and chickpea pellets for health-focused brands in 2024. By skipping the frying step, the facility cut oil use by almost 90% and positioned the product as a clean-label snack. The same base pellet line runs conventional fried products during other shifts, giving the plant flexibility to serve both markets.
Frequently Asked Questions
What are snack pellets made of?
Snack pellets are made from starches and flours such as potato starch, corn starch, wheat flour, cassava starch, and rice flour. Producers may add modified starches, proteins, fibers, emulsifiers, salt, and flavorings depending on the target product.
Why are snack pellets dried before frying?
Drying reduces pellet moisture to 8–12%. This creates a hard, dense, shelf-stable structure and ensures proper expansion during frying. Without adequate drying, pellets may crack, expand unevenly, or absorb too much oil.
What is the difference between snack pellets and directly expanded snacks?
Snack pellets are semi-finished products made in two stages. Directly expanded snacks are cooked and expanded in one continuous extrusion step. Pellets offer longer shelf life, easier transport, and more flexibility in final expansion method.
What temperature are snack pellets fried at?
Most snack pellets are fried at approximately 190°C. The exact temperature and time depend on pellet size, moisture content, and desired expansion.
How long do dried snack pellets last?
Properly dried and packaged snack pellets typically last 12–24 months. Storage should be cool, dry, and protected from humidity.
Can snack pellets be baked instead of fried?
Yes. Snack pellets can be expanded by baking, air popping, or roasting in addition to frying. These methods produce lower-fat snacks and support health-focused product lines.
What causes snack pellets to crack during frying?
Cracking is usually caused by uneven moisture distribution, over-drying, or rough handling. Lowering drying temperature, extending drying time, and handling pellets gently can reduce breakage.
Conclusion
The snack pellet production process is a two-stage discipline. First, you create a stable, low-moisture half-product through mixing, extrusion, shaping, and drying. Then you expand and finish that pellet through frying, baking, air popping, or roasting.
Every stage affects the next. Moisture control in mixing determines extrusion behavior. Gelatinization in extrusion determines expansion quality. Drying uniformity determines frying performance.
When operators understand these relationships, they can produce consistent, high-quality snacks at scale.
For manufacturers entering the pellet market, the key is to treat the line as an integrated system. Choose equipment that matches your product portfolio, raw materials, and capacity goals. Build quality checkpoints into every stage. And plan for the flexibility that pellet technology offers, whether that means regional frying, health-focused expansion methods, or seasonal product rotations.
Ready to set up or upgrade your snack pellet production line? Contact Shandong Loyal Industrial for a consultation. Our engineering team can help you configure a single-screw or twin-screw extrusion line tailored to your 2D, 3D, or hybrid snack pellet goals.